| Info |
|---|
App descriptions, when different will include information about hosting method to which they apply. |
Cloud
Server & Data Center
Thank you for choosing The Scheduler!
On this page you will learn how to configure app and how to start using it to its fullest potential.
We will cover:
App usage
Permissions
Settings
Some of the features
Documentation, Support & Feedback
App usage
The Schedulers Scheduler's main job is the to create Jira issues - , but on scheduled time. It allows easily create tasks in future through The Scheduler, thanks to its simple 3-step wizard . Scheduling options are quite flexible, with different with flexible scheduling options and various types of triggers, makes it possible for you can to schedule issue creation your issues’ creation in advance, depending on your needs, every 2 weeks, 2 month months or even with the use of advanced cron expressions. All depending on your needs.
Wizard compose consists of 3 steps:
Scheduled Issue details - name, description - place to describe the template Basic Info - you have to fill out the Scheduled Issue form with basic info: define issue’s name and description (searchable in SI table, so describe it well).
Issue details Details - contains fields from create issue screen for particular project and issue type. If you are missing fields the Create Issue screen that correspond with particular projects and issue types. If specific fields are missing, please check if those appear on Jira create issue screen
Triggers - when issue should be created, there are many types of triggers available
your Jira’s Create Issue screen and/or check your Issues' configuration.
Trigger Details - here you can determine when an issue will be created. Several trigger types are available.
The Scheduler’s another purpose is templating - it keeps issues' details in a template and creates tasks when needed. For that you can use either Manual triggers (or any other trigger type), and use or “Execute” option when needed. Eg. Your . For example: your onboarding process can be scheduled as a Task with certain Subtasks.
Permissions
By default Jira Administrators and Project Administrators have access to all Scheduled Issues in project. But app can be configured to allow certain Jira users to use the app and schedule issues. It is managed with global and project permissions.
Custom permissions created by app:
Global: The Scheduler: Access
This global permission is required for users to access the app on global level. Project and Global Administrators are granted this by default. This permission is like an app wrapper, on project level users are required to have permission “The Scheduler: Use”.Project: The Scheduler: Use
Granting this permission allows to use the app for creating scheduled issues (create, edit, view, delete). Project and Global Administrators are granted this by default - to ensure app can be used and managed. Global permission “The Scheduler: Access” is required.
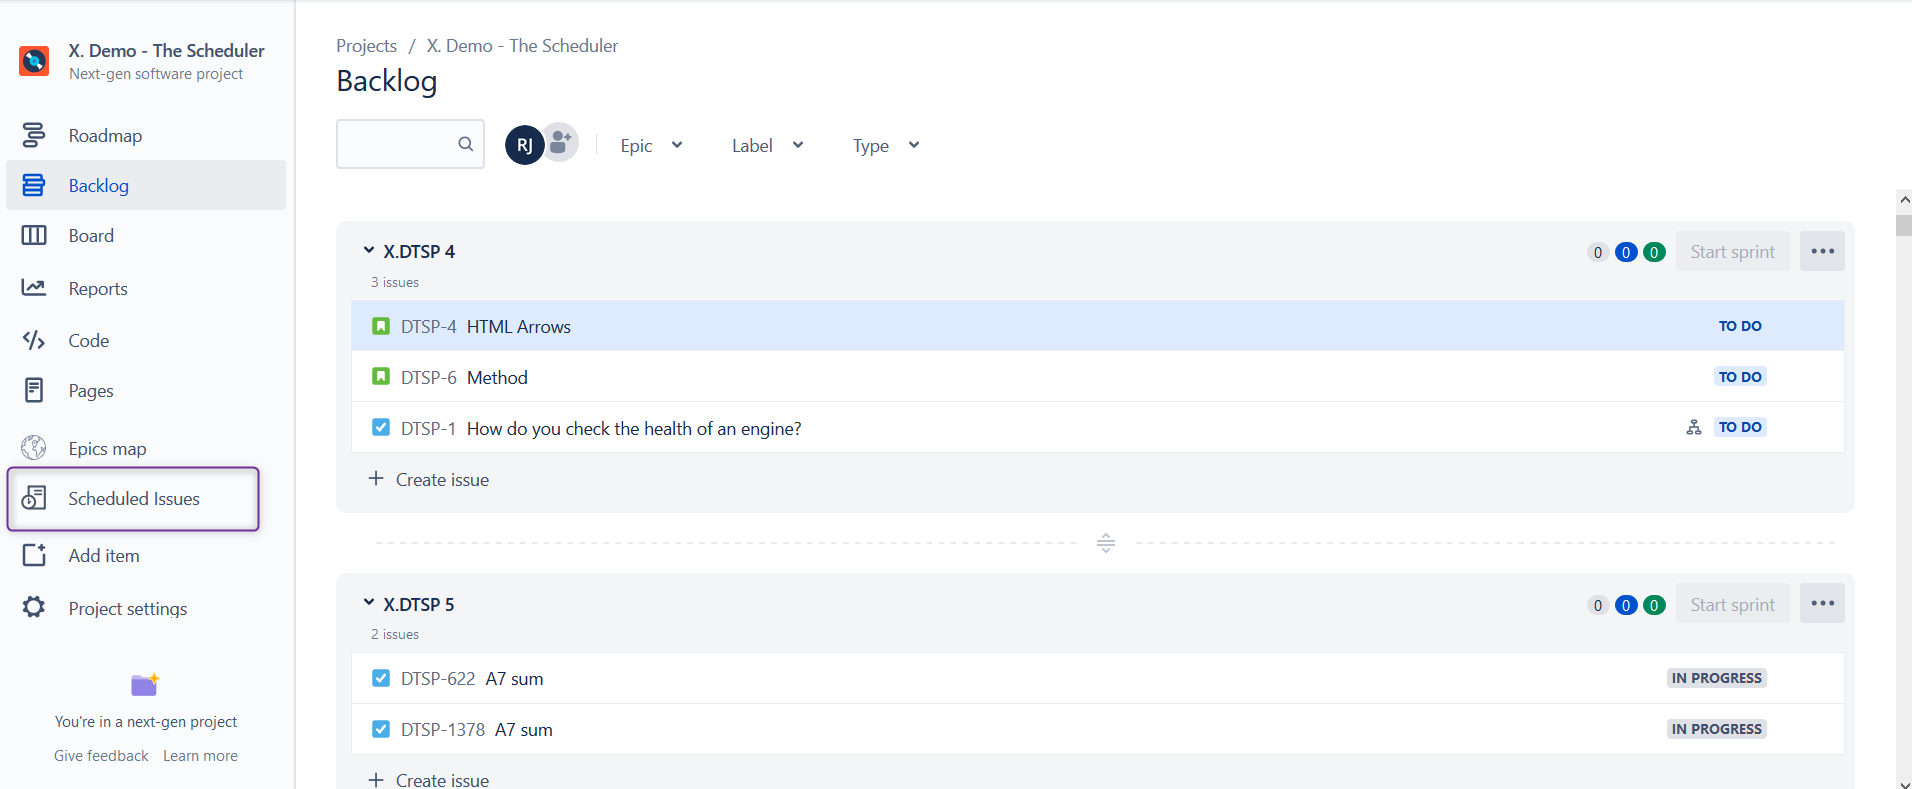
When user is granted with app permissions, new option “Scheduled Issues” will appear on the project sidebar:
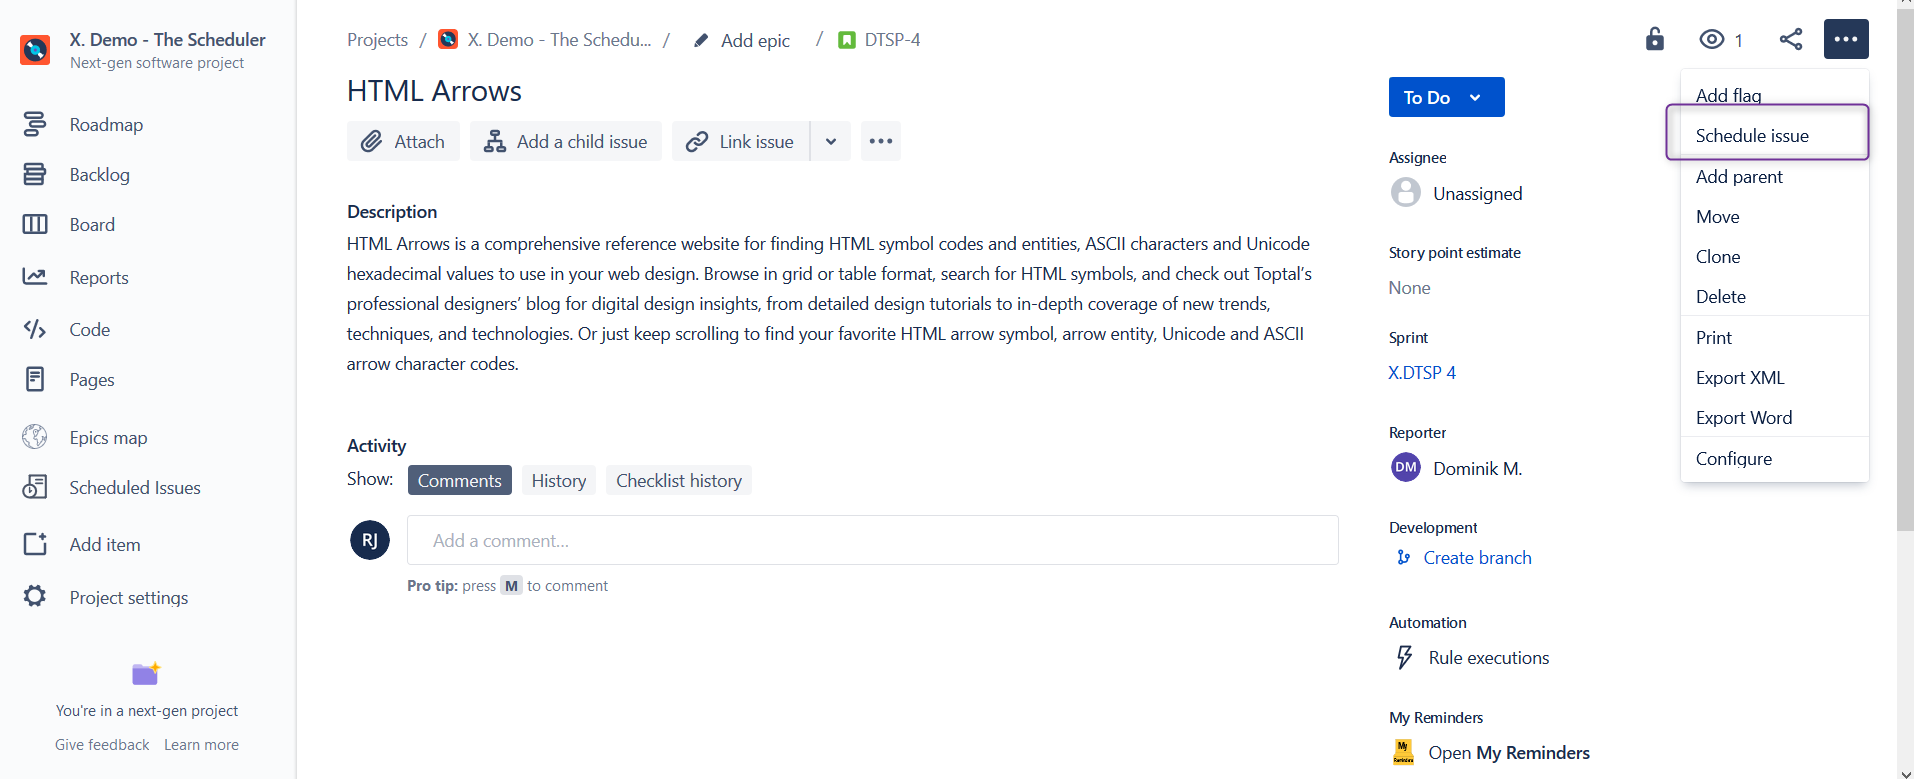
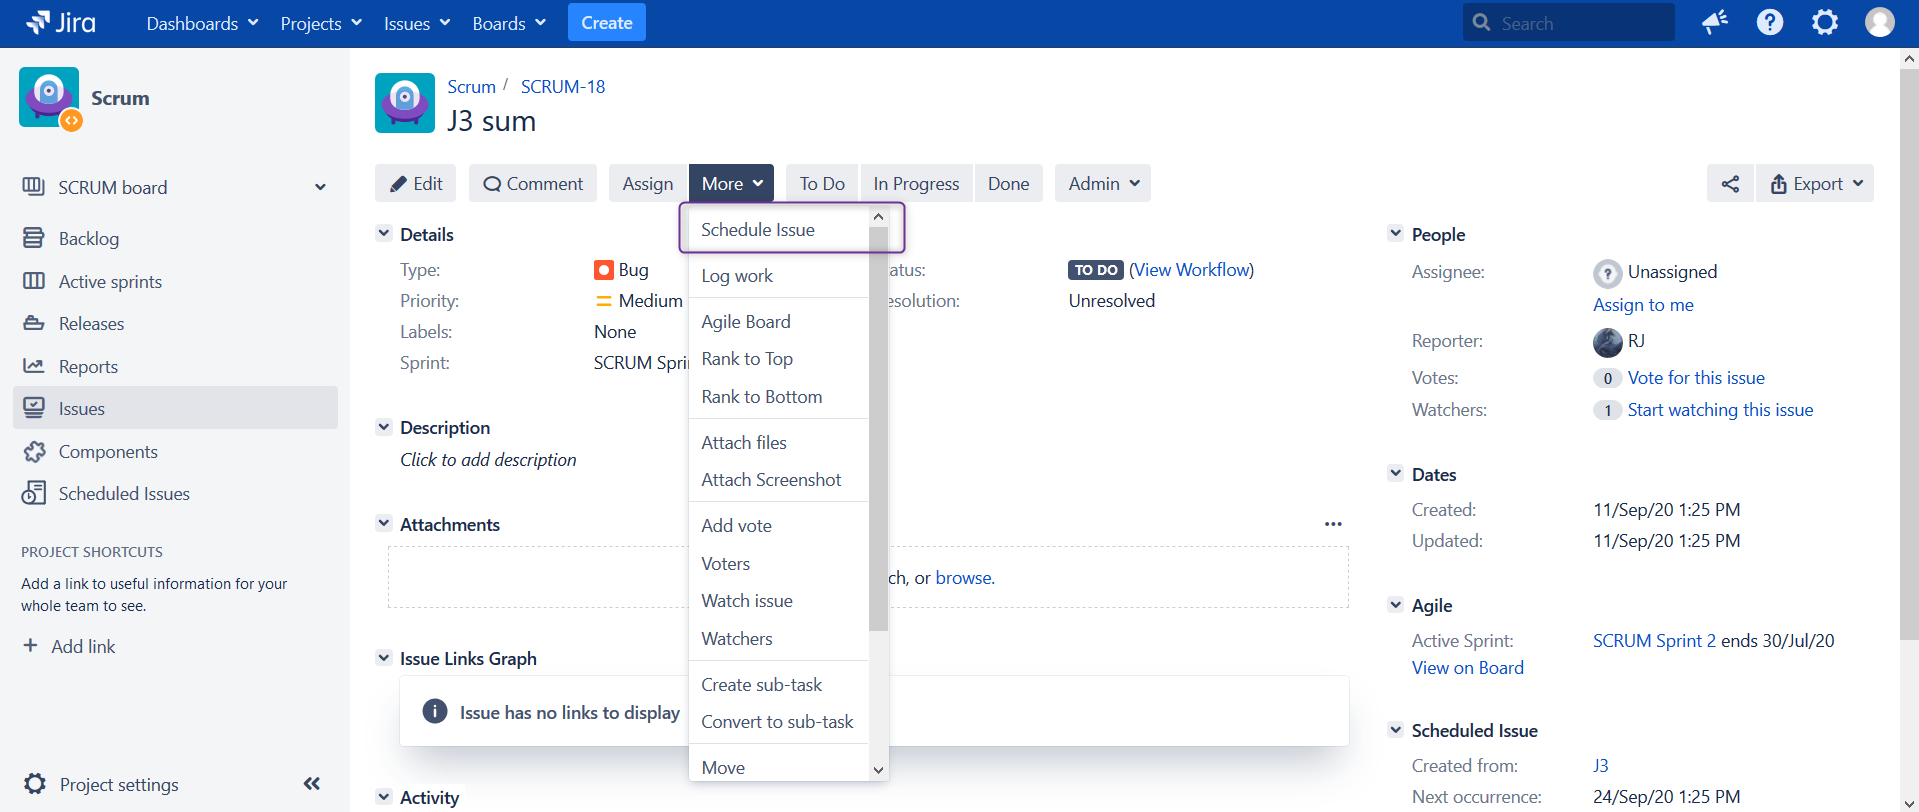
On existing Jira issue, new option ‘Schedule Issue’ will be available in more actions:
Settings
Besides Global Calendars, The Schedule is managed on project level, where project administrators can grant access to app, set up Project Calendars and set up failure Notifications.
Within notifications section they can decide who will receive notification of failures eg. issue is not created, and fallback if this notification cannot be send. This feature allows to make sure that even if the task is not created → right person is informed and can take action to fix the Scheduled Issue or create a task manually.
Global settings
In the Manage apps → The Scheduler section on the left taskbar → Global Settings <as link>, you can find configuration options, which will have impact for the whole application. eg.
Limit the number of displayed issues in: execution history, upcoming executions or failed executions log.
Change some off the options and allow/block overriding those in project settings.
Default Share Settings
Scheduled Issues are private by default, but with default share option you can share newly created Scheduled Issues with chosen groups, users, roles or all Jira users (to allow them editing). Sharing also can be done on single issue or in bulk, but this option expands access to SI by default.
Features
Predefined variables
If you need to add date in the summary, description (or any other text field) you can use Predefined variables. Those are variable variables which depends depend on the creation or execution date dates and can be converted to the corresponding values on during issue creation. Here you can find table with available variables and usage examples: Predefined variables
Date fields
In Jira fields like due date are static - fixed to 1 date, within our templates you can link due date with task creation date eg, make it dynamic with 2 weeks from creation date, or link it with next execution time, this way task should be done before new one gets created.
Execution related
There are some features like <initial issue status> which can help you in managing your tasks visibility on kanban board. It might also help in templating eg. when you execute scheduled issue it will change into your chosen status eg. ‘in progress’
For template diversification, you can use special user picker features, allowing to change assigned user, to the user who performed action, more about it in Manual Execution features
Documentation, Support & Feedback
| Info |
|---|
In app, On page, this should be placed in 2 columns to save some space: Documentation | Support, and Feedback section below |
Documentation
In our documentation we try to give clear usage examples with steps to follow. Notice that app is available in Cloud and Server (& Data Center) versions, with some differences in features.
To learn about app updates please check Release Notes for Cloud or https://marketplace.atlassian.com/apps/37456/the-scheduler/version-history for Server/Data Center.
Support
If case of any issues with the app, or if you have ideas for new features or improvements, please let us know by creating a ticket on our Customer Portal
If you think you found a bug, please describe the behaviour and steps explaining how to reproduce your problem - we will do our best to fix it. To speed up the process, in the initial contact please include:
Link to your instance URL
Browser logs: How to gather browser logs
Info about The Scheduler and Jira versions
Jira logs: How to gather application logs
Browser logs: How to gather browser logs
Feedback
Each day, we are working to improve our app by bring new features. If you like it or if it saves you time, help us by letting other Jira Admins to know about it. You can do it by leaving a review or feedback on marketplace. We really appreciate it, it gives us a boost ![]()
Leave a review: Cloud, Server, Data Center
If you would like to share your success story or your usage examples from your organization, please let us know through Customer Portal, we would love to hear how our apps helps you on a daily basis.