Templating allows you to insert variables into spreadsheet and fill it with specified issue data. It can be used for creating templates and fill it in real time (powered by Excel).
It contains of 2 sections :
This feature is available cross worksheets, it means that if you import issues in sheet1, this feature will also be available in sheet2, sheet3 etc. even if you didn’t fetch there any issues.
Import
Work on already fetched issues or import issues, without displaying them on worksheet.
You can work on already fetched issues or import issues without displaying them. We will use the templating build-in import.
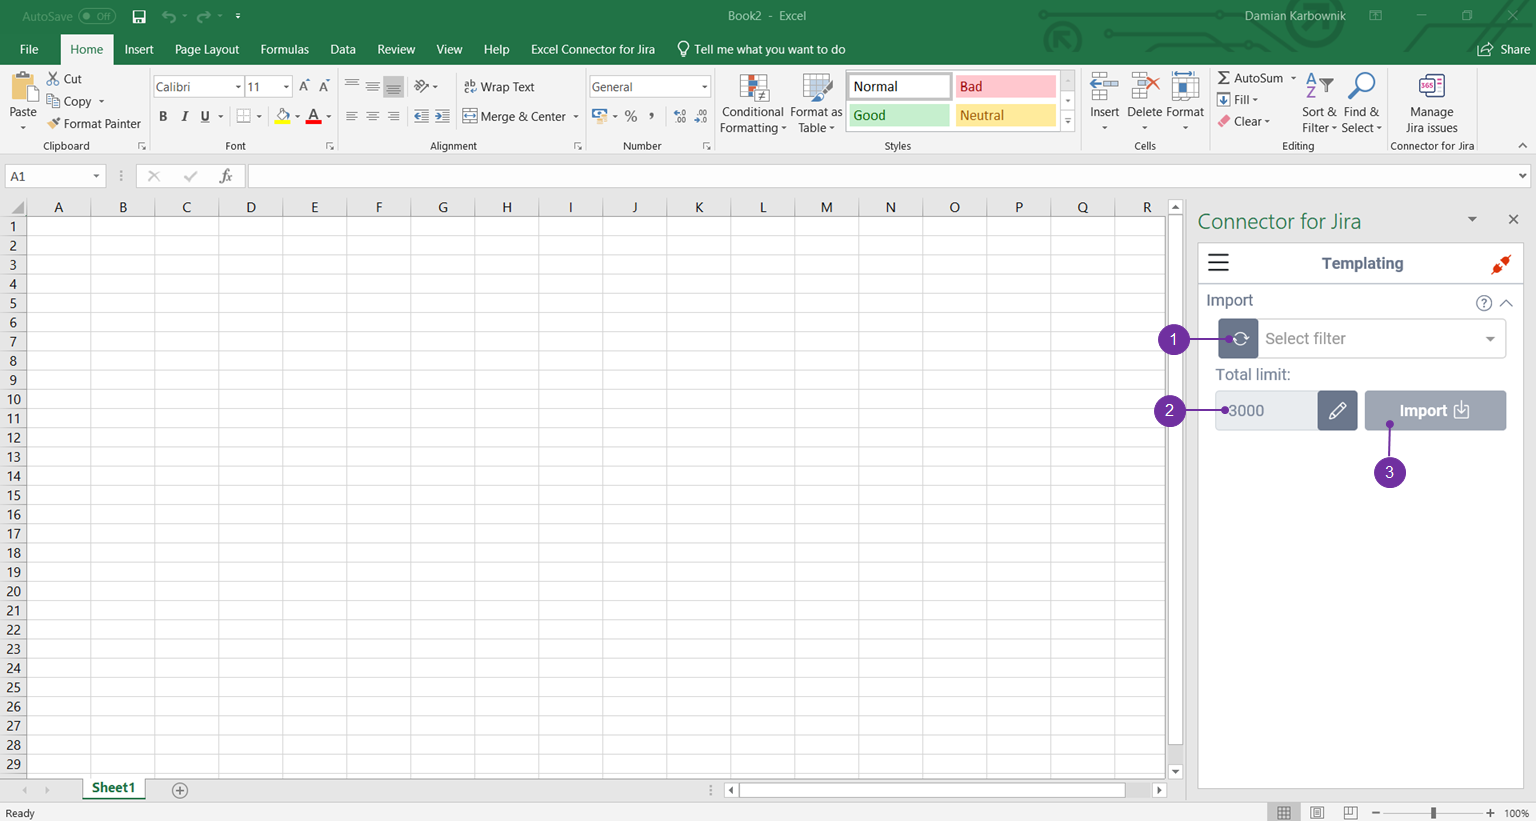
Start by selecting filter (1) from the dropdown list, if needed you can change default limit of fetched issues (2). When you click Import (3) button, issues will be fetched in background and you will unlock new “Template” section.
Template
Build a template using prefix and field ID. Select an excel cell and use ‘Set Variable’, when you choose issue and use ‘Fill’ action, it will change variable into value from chosen issue.
You can use multiple variables in 1 template, ‘Fill’ option work on selection and fills all variables (with values) matching current prefix.
If you want to revert changes (filling variables) use the back button.
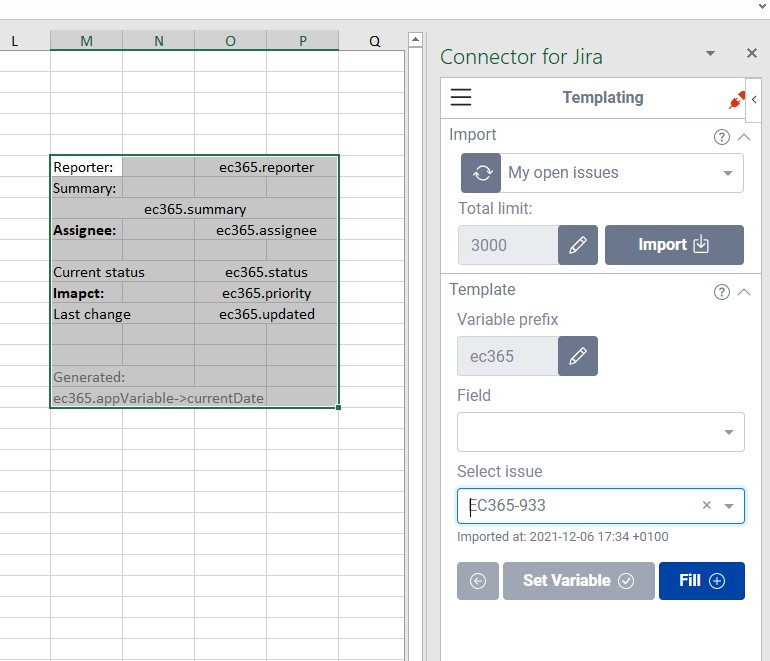
To build a template you need to have some building blocks like variables, which will be filled with data of the selected issue.
Variables are build of prefix and Field ID, by default variable prefix is set to ec365 (but you can change it easily). For example: if you would like to use assignee field in the template, you should use (prefix.fieldID) → ec365.assignee variable in any of the cells,
You can insert variables in worksheet in few ways:
manually, by typing it into desired cel
by copy & paste the field ID with prefix, from the field section: https://psc-software.atlassian.net/wiki/spaces/ECSD365/pages/2412445711/Visible+Fields#Checkboxes%3A-Field-ID%2C-Prefix into cell
with ‘Set Variable’ button, which will insert variable into currently active cell
select field from the dropdown list
in the worksheet select cell, where you want to insert variable
use ‘Set Variable’ button

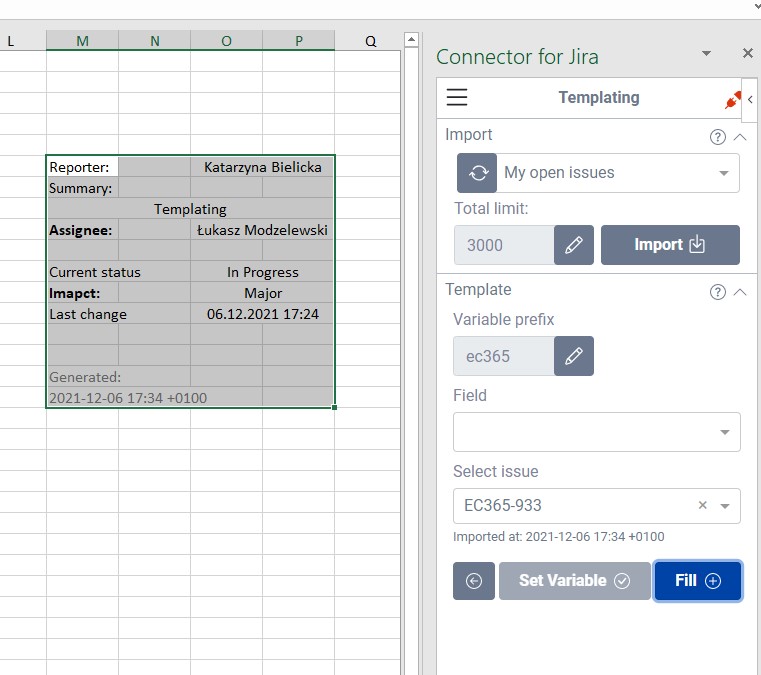
To fill variables select cell (or cell range), then Select issue from the dropdown, then click Fill button, your variables will be filled with data from the selected issue.
When you click fill and the cell is empty, it means that it doesn’t have any data
You can reverse changes with the back button, remember to select all affected cells
Example
Here you can see a template with some basic issue details, and selected all issue (in the dropdown), the whole cell range is selected with variables:
Using Fill on selection, will update data with details from issue:
To reverse template fill, use the back button → it will show variables again, then just chose next issue and use the fill option
Notice there is special app variable: ec365.appVariable->currentDate, it can be used to add the timestamp of the template filling
To learn more about Templating visit our step by step instruction from the previous version: Templating [old]