Create Scheduled Issue form allows you to create draft of issues which will be reproduced. The form is divided into three-step wizard:
- Set Basic Info (1) - information about SI;
- Set Issue Details (2) - data provided here will be used to create the SI;
- Set Trigger Details (3) - here you specify, when you want defined earlier issue to be created.
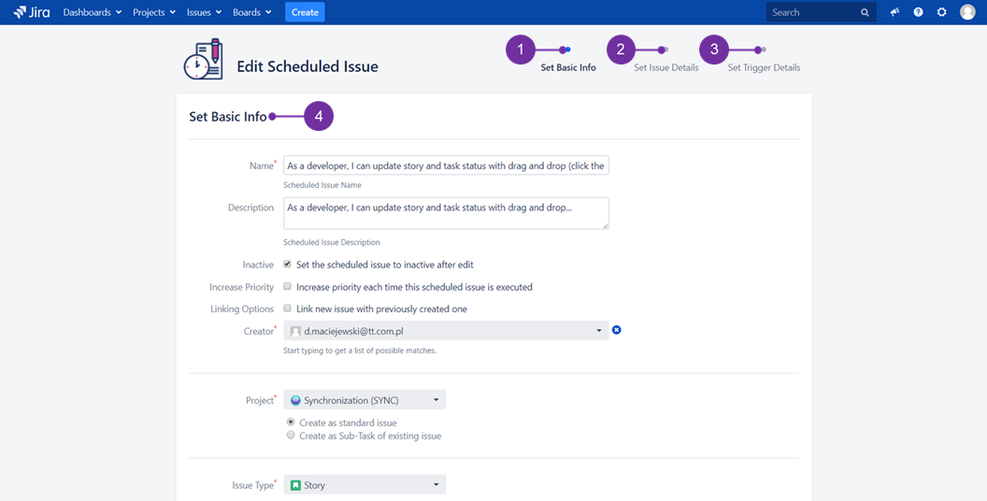
![]() Currently accessed screen of the wizard always contain proper header (4) as presented above.
Currently accessed screen of the wizard always contain proper header (4) as presented above.
The Scheduler copies all fields from an issue's creation screen and follows the field permissions, which means that all of the add-on users are able to see only fields available to them.
What's more, even already created issues are subject of validation. When changing permissions, invalid (in terms of permissions) fields ceases issue creation. In this case, scheduled issue creator just have to edit invalid Scheduled Issue (or contact to the Jira administrator to do it). The edit form will add missing files or remove the forbidden fields by default.
You can create new Scheduled Issues in two ways:
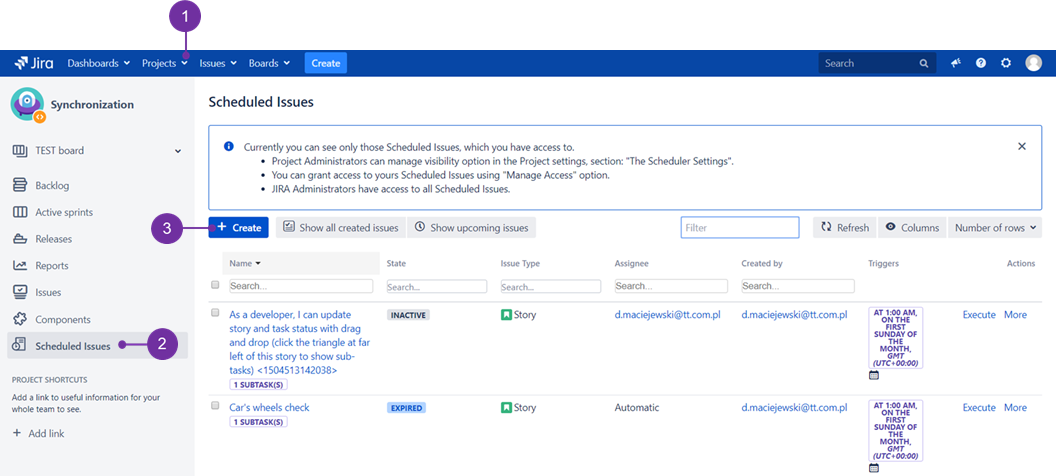
- By pressing Create button on the Scheduled Issues page. To do it: use the drop-down menu cloaked under the "Projects" (1) to access a desired project and then go to the below located "Scheduled Issues" (2) to find "Create" (3) button. By clicking onto it, you will be presented with three-steps wizard.
2. Or by choosing Schedule Issue action hidden inside "More" menu. This method is available only if you have an issue already created, so first one needs to access any existing issue (1), next click "More" (2) and "Schedule Issue" (3):
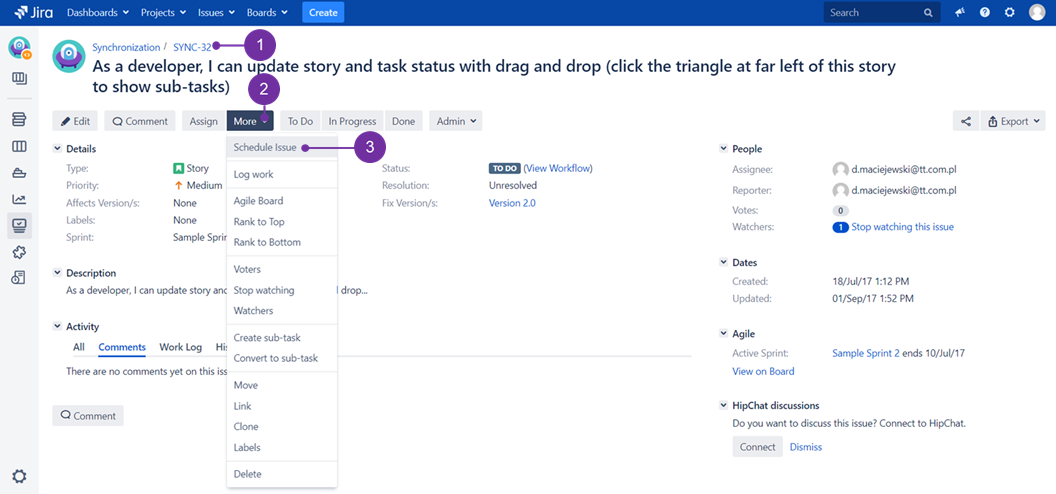
![]() In case of performing "Schedule Issue" action via the below illustrated method, the creation form will be filled by values taken automatically from a current issue (i.e. name, description etc.). Be advised:
In case of performing "Schedule Issue" action via the below illustrated method, the creation form will be filled by values taken automatically from a current issue (i.e. name, description etc.). Be advised:
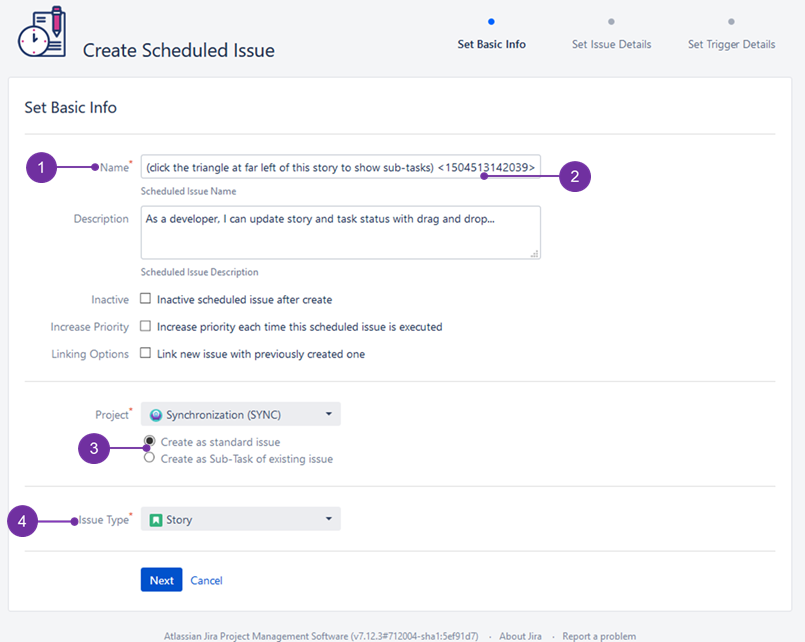
- The "Create Scheduled Issue" three steps wizard, opens directly after selecting "Schedule Issue".
- The attribute "Name" (1) is required and must be unique in the project. Please be aware about a randomly generated number, placed within < > (2). It enables to automatically create new, unique name without any additional action needed of your side.
- As for selection between "Create as standard issue" vs "Create as Sub-task of existing issue" (3) - If you select the latter option, add-on will be creating new issues as Sub-Tasks of a chosen, already existing issue.
- The attribute "Issue Type" (4) is required and determines the type for Issues that are created when a Scheduled Issue is fired.
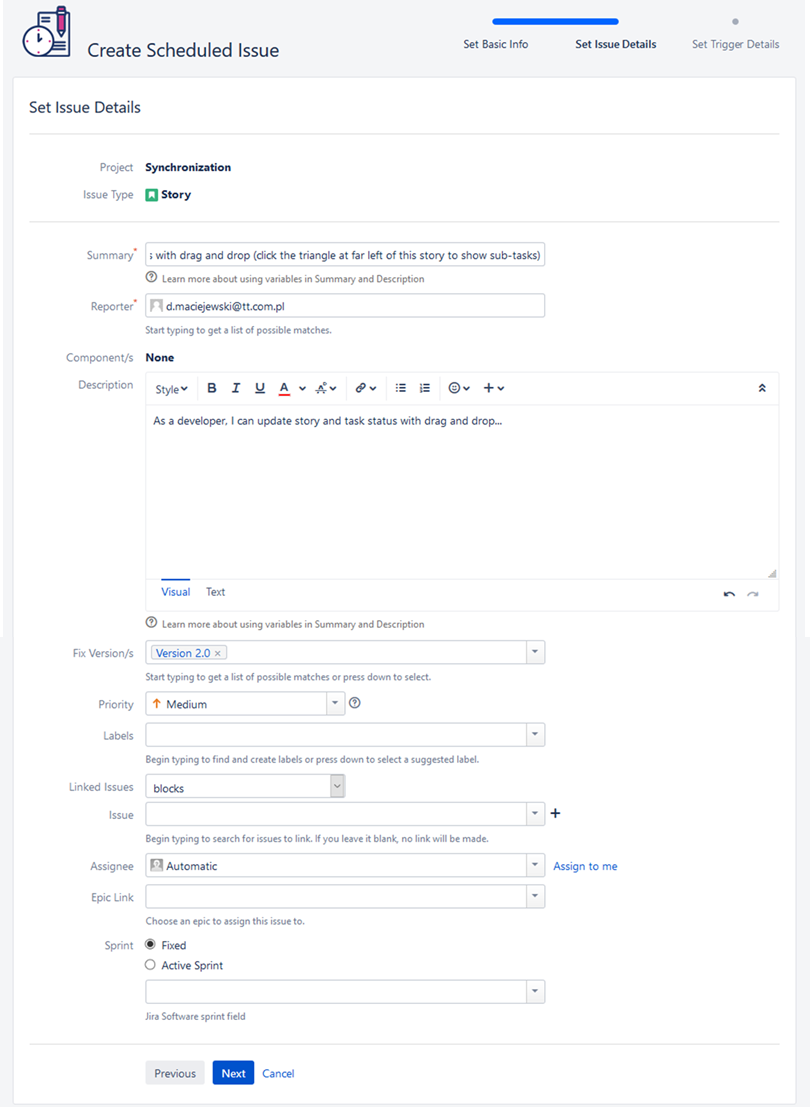
Open second wizard page by pressing the "Next" button and enter all required and optional values for a picked issue type:
On a third, final step, select desired "Trigger Type" (1), "Interval" (2) and its "Start/End Date" (3). Multiple triggers can be added to a single scheduled issue that is to be created. For each trigger you can use different "Calendar" (5).
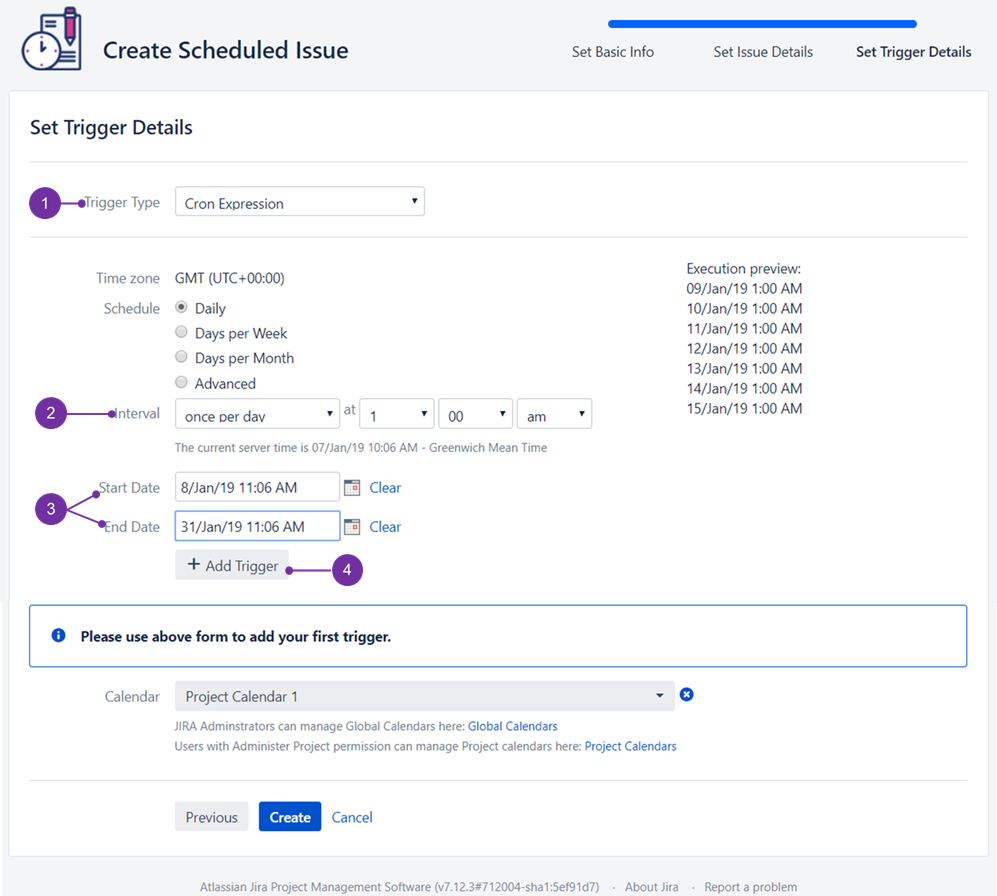
![]() After each trigger is set as desired, please remember to use "Add Trigger" (4) button.
After each trigger is set as desired, please remember to use "Add Trigger" (4) button.
![]() After clicking on "Add Trigger" you ought to get a similar table entry, as illustrated below:
After clicking on "Add Trigger" you ought to get a similar table entry, as illustrated below:

If everything is as planned please click on "Create" and you will see it under "Scheduled Issues" overview.