Using the Execute action it is possible to force planned action execution without waiting for next valid point of time.
You can Execute Scheduled Issue by choosing one of the links:
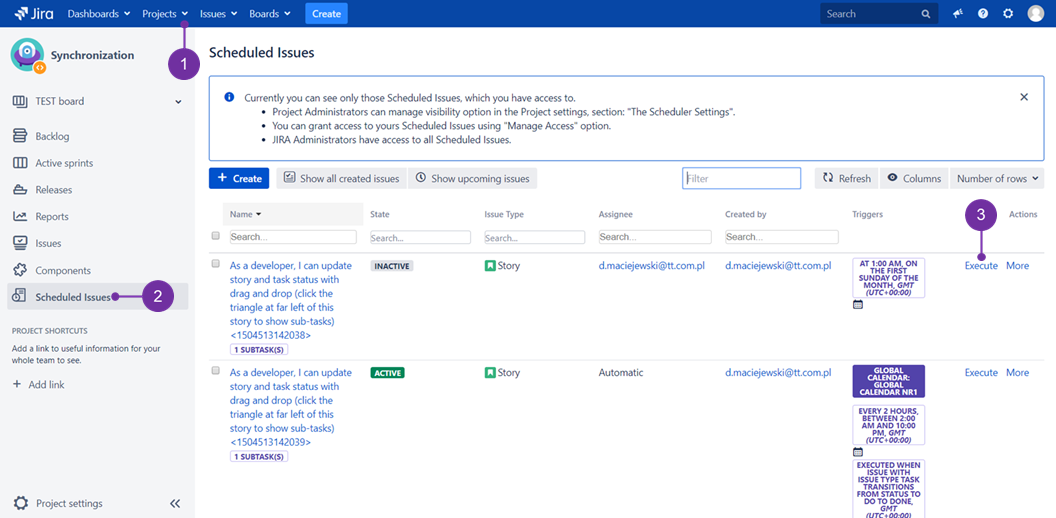
- By choosing Execute link next to the Scheduled Issue in Scheduled Issues table:
Use the drop-down menu cloaked under the "Projects" (1) to access a desired project and then go to the below located "Scheduled Issues" (2). Scroll to a desired scheduled issue and then click on "Execute" (3) link.
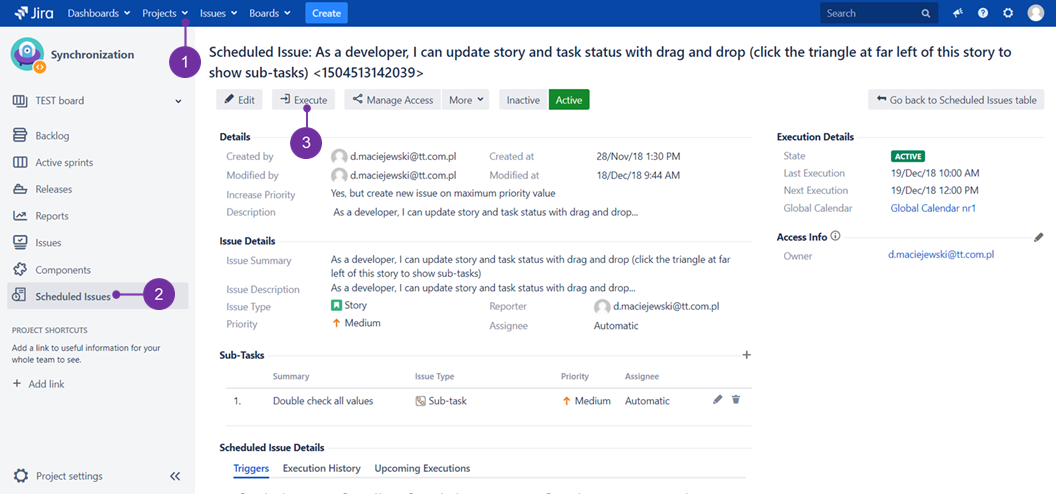
- Or by entering Scheduled Issue details page and clicking Execute button:
Use the drop-down menu cloaked under the "Projects" (1) to access a desired project and then go to the below located "Scheduled Issues" (2). Select desired scheduled issue and then click on "Execute" (3) button.
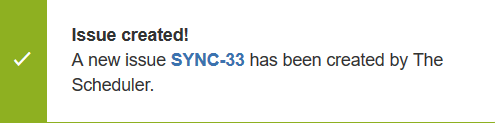
The fired (executed) Scheduled Issue is being displayed as a pop up with proper information:
After performing manual execution, you can surely spot in "Execution History" of such issue an "M" emblem, which is an indicator of such execution type.
%20-%20manual%20execution%20outlook.png?version=1&modificationDate=1546249766529&cacheVersion=1&api=v2)
![]() For more information about a list of created issues, please click here.
For more information about a list of created issues, please click here.