The Scheduled Issues table is the place where you can see all created Scheduled Issues for the project. You can access Scheduled Issues table by clicking on Scheduled Issues. To do so, use the drop-down menu cloaked under the "Projects" (1) to access a desired project and then go to the below located mentioned access link (2):
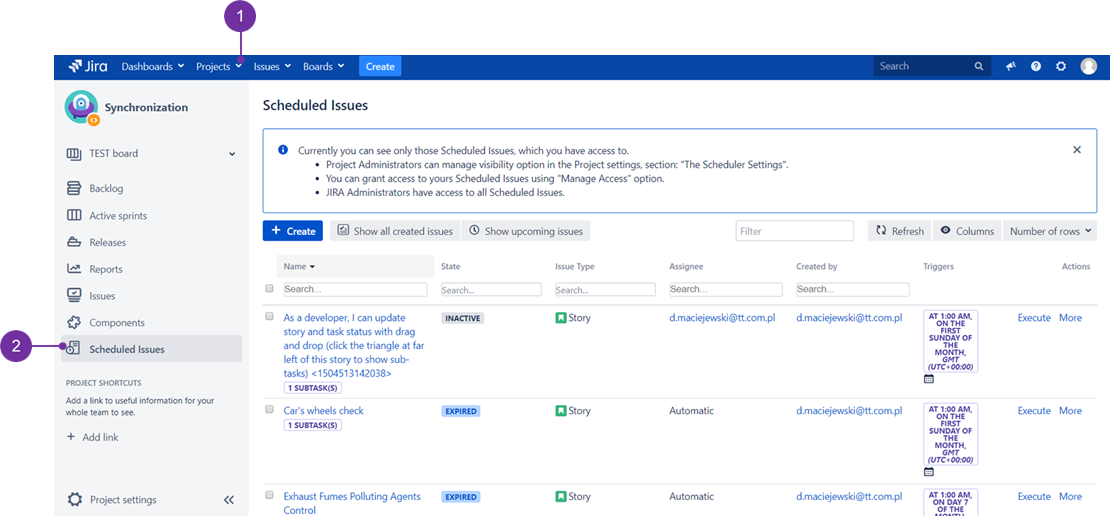
NOTE: Only users with the granted permission to manage Scheduled Issues can access that table. JIRA Administrators can set permissions in the Access Manager.
You can create new Scheduled Issues here and manage Scheduled Issues created by yourself or shared from other users. You can access managing options by choosing More option next to each Scheduled Issue and choosing one of the following options:
- Edit
- Manage Access (Only Creator of the Scheduled Issue and JIRA Administrators can manage sharing options)
- Disable
- Clone
- Delete
Under the Scheduled Issues table you can choose following bulk actions:
- Edit Selected
- Share Selected
- Delete Selected
![]() Location of "More" link (1):
Location of "More" link (1):
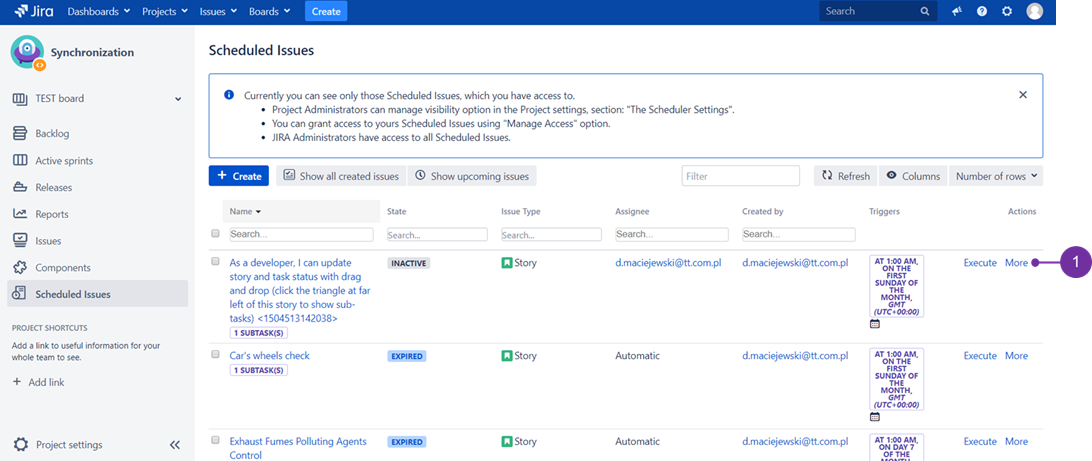
As one can see, any already existing scheduled issue has such link.