Excel 365 Connector for Jira is an integration tool, allowing you to work on your Jira issues with comfort and power of Excel.
...
In Excel, in the Home panel find “Connector for Jira”. You will see an icon with the app logo:

In case if you have installed the app, but cannot find it in ribbon, please check ribbon customization options, to make sure app is added and selected in any of visible Excel tabs:
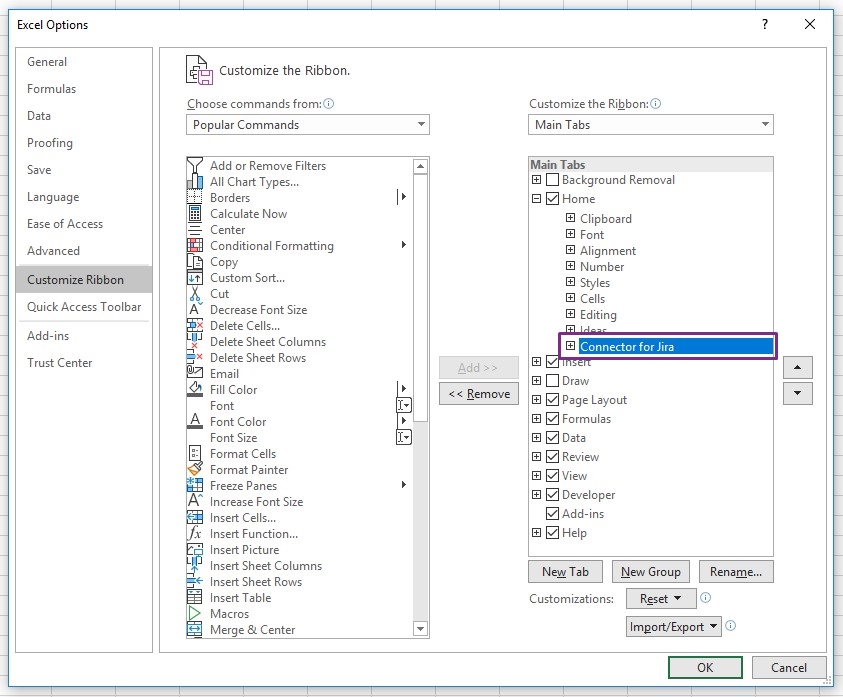
Note: you can easily change its position to fit your need.
Click on the Icon, it will open a panel with app logo, usage examples and action buttons (this page is linked under ‘How to start’
 ):
):
...
Type in your Jira URL. Your Jira must be running on https, your URL must not include any trailing signs. Eg. correctly looking link https://your-jira.your-domain.com. If you want save provided URL for the future, then select checkbox “Remember Jira URL”. Click button “Next”.
Depending on your Jira environment, you will see two different views:
For Data Center you will see a login form, where you need to specify your login details:
Username - Username, which you use to login to Jira.
Password - Password, which you use to login to Jira.
Checkbox “Save Username on this workbook”
Button Log in
...
After logging in, the main app’s menu will be displayed:

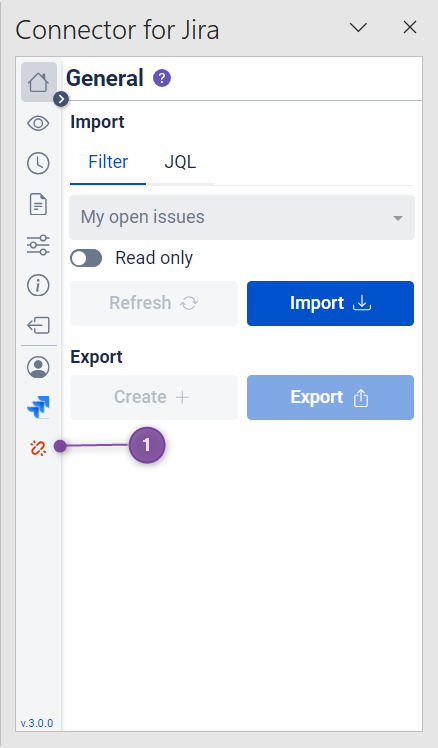
Notice: red plug icon(1) and information about worksheet not managed by Connector for Jira - it means there is no metadata linked with this worksheet, in other words no issues were fetched or created from this sheet. We will get into this later on.
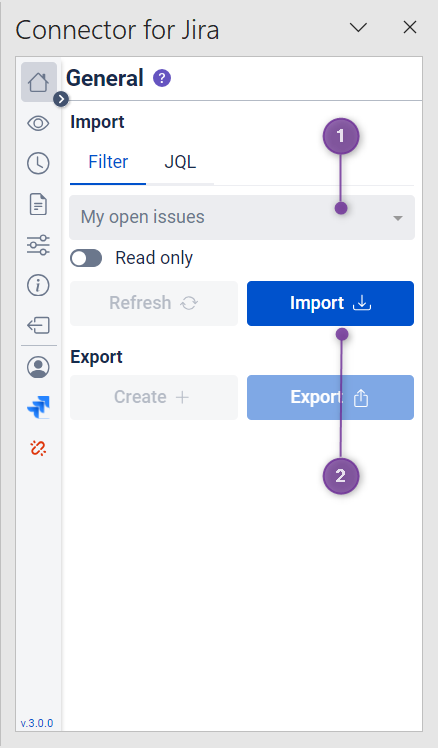
Getting data from Jira issues: to start working with the app and tasks you need to get some data. you can start by selecting filter e.g. “Reported by meMy open issues” (1) then use the “Import” button (2). When you do that, Connector for Jira will download all issues from that filter to your workbook. You can learn more about getting Jira issues into Excel in this section: Fetching issues

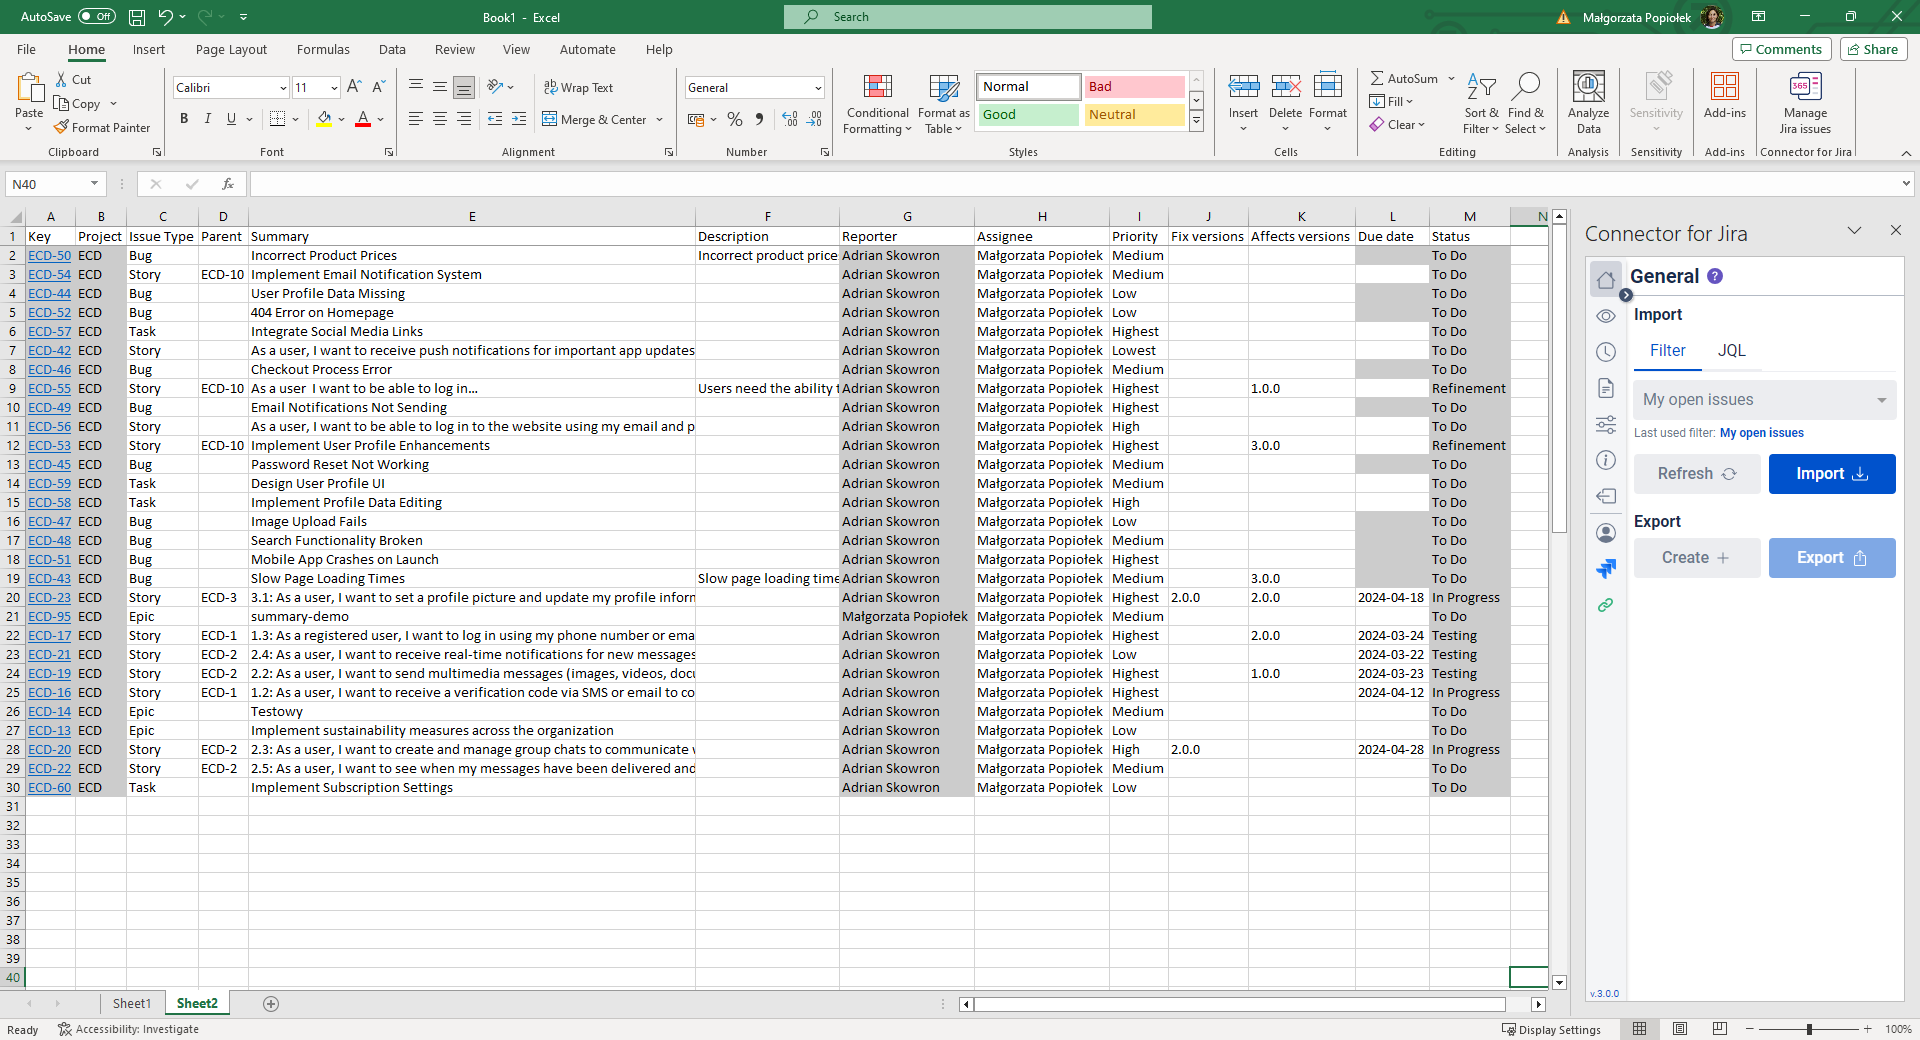
Now you can start working with data.
Notice: green plug icon (1) and information about worksheet is managed by Connector for Jira
Edit existing issues.
Create new issues: Create new issue
When you make changes Excel will color some of the cells, more about colors: Color legend [old]ARCHIVED
When you create/edit issues remember to use “Export” button - it will send updates to Jira (it’s like a save button, sending changes to Jira), it will send all changes made in the sheet, with confirmation prompt.


After confirming changes and exporting issues to Jira, coloring will disappear.
If you are creating reports / performing calculations based on available fields: you can use “Refresh” to check, if any data from displayed issues was updated in Jira in the meantime.
When you are done or need a break, you can save the file and get back to it later. Just remember: if you want to send your changes to Jira, you have to log in again.
| Note |
|---|
Be aware: if you refresh the spreadsheet without sending update to Jira, your work will be lost - since it will download refresh data from Jira. On the other hand, if you send issues to Jira, after a break or next day - it will override changes made by other users in the fields edited in Excel. |
For testing purposes
You can use our demo user, in our demo Jira instance with limited capabilities allowing to browse certain demo project, create, edit issues etc.
...
. |
...
Jira URL: https://ttpsc-demo.atlassian.net
Username: user-demo@niepodam.pl
Token (to login through app): GCrLogmSjdPE28xjy8daE934
Password (in case you want to verify task in Jira): user-demo
| Warning |
|---|
Access for this user might be revoked without further notice. |
...
...