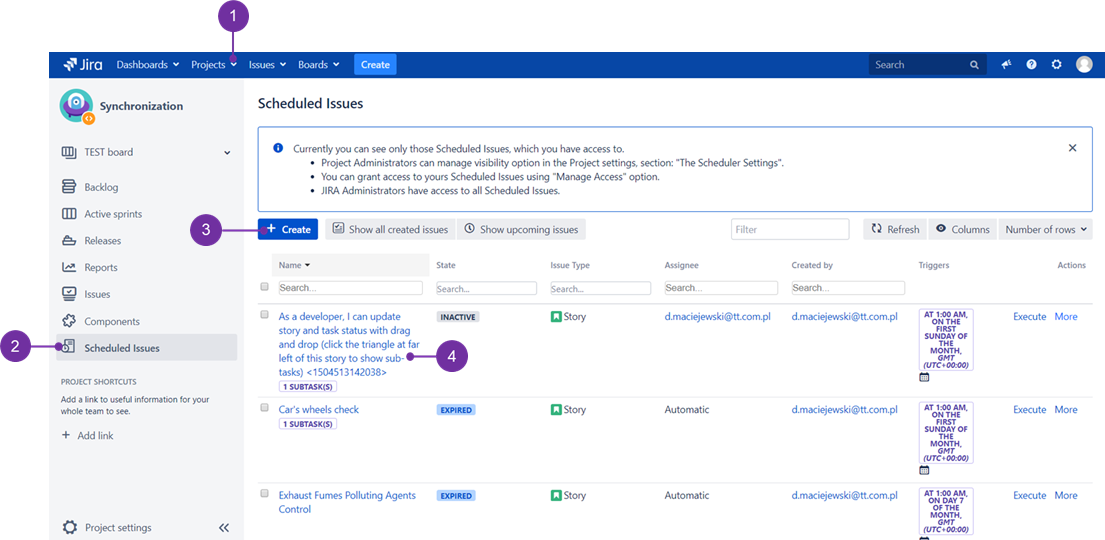
If you are either the creator of Scheduled Issue, JIRA administrator, or the specified Scheduled Issue was shared to you, it is possible to access Scheduled Issue details page by clicking on the Scheduled Issue name in Scheduled Issues table.
To do it, use the drop-down menu cloaked under the "Projects" (1) to access a desired project and then go to the below located "Scheduled Issues" (2) to find "Create" (3) button. It is possible to access Scheduled Issue details page by clicking on any of Scheduled Issue names in Scheduled Issues table (4):
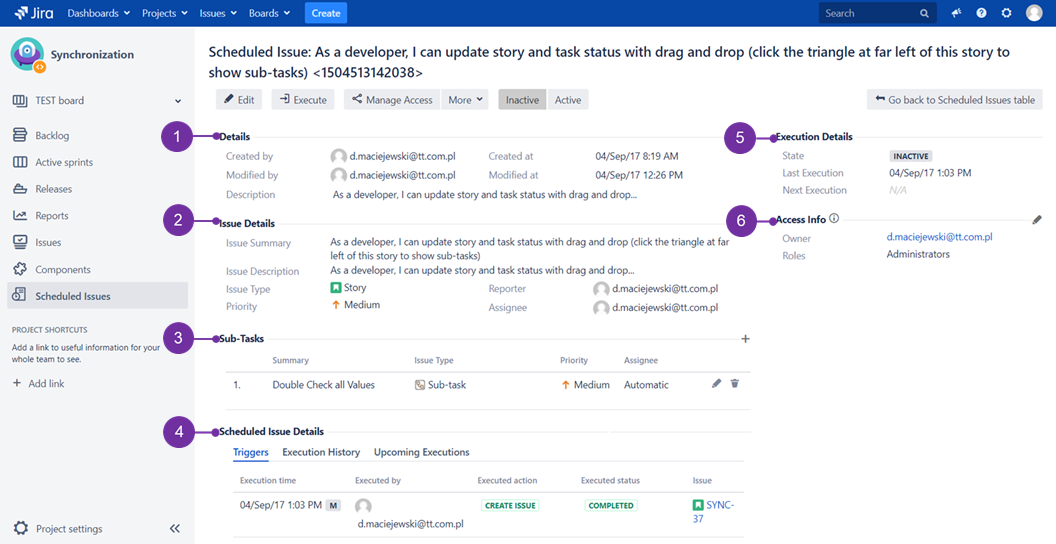
This is how Scheduled Issue details page looks like - it opens when you access any of the listed Scheduled Issues. Pointed sections with numbers are explained below:
- Details (1)
Here you can find basic information about Scheduled Issue, like creation and last modification dates, Scheduled Issue description and additional information like increasing priority or linking settings.
- Issue Details (2)
Issue details presents most important field values that will be set on the newly created issues from this Scheduled Issue.
- Sub-Tasks (3)
Here you can add, edit and remove sub-tasks that will be created with the main issue. This section is visible only if Scheduled Issue has standard (non sub-task) issue type, and sub-tasks are enabled in Jira.
- Scheduled Issue Details (4)
This section presents details about scheduling new issues - you can find information here about the triggers, execution history and upcoming executions in the future.
- Execution details (5)
This section describes the current state of Scheduled Issue and presents last and next execution dates.
- Access info (6)
"Access info" informs who can access this Scheduled Issue - it presents owner (creator) of the Scheduled Issue, and if creator has granted access to Scheduled Issue for other users, it will also be indicated here.

