Upgrading to Vacation Manager 1.3.0
Upgrading from versions older than 1.2.0
Before upgrading to 1.3.0, first you have to follow Upgrading to Vacation Manager 1.2.0 instructions.
Upgrading from version 1.2.0
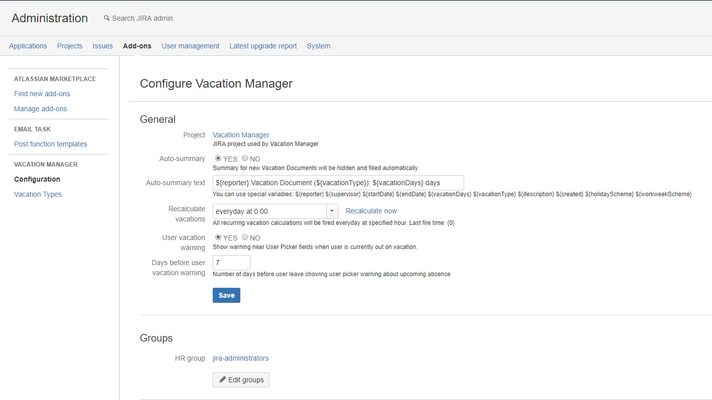
![]() Before being able to do the below steps, you needs to install version 1.3.x of the add-on, then please access Vacation Manager Configuration (available in add-ons section).
Before being able to do the below steps, you needs to install version 1.3.x of the add-on, then please access Vacation Manager Configuration (available in add-ons section).
For the rest of the steps presented below (1 - 5), please uncloak needed one (note that they were put in an order that you should follow accordingly and do not omit any of it):
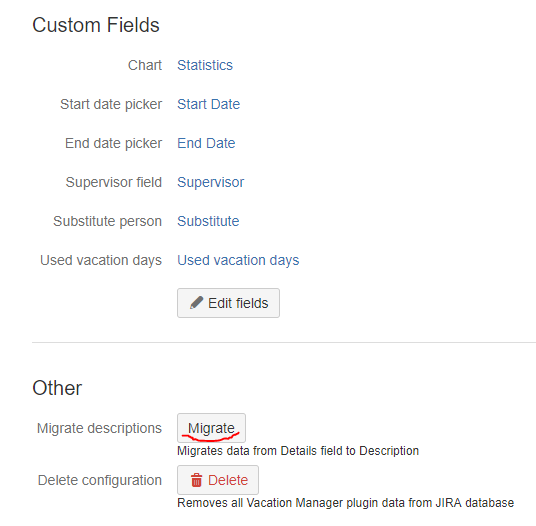
Migrate field "Details" to "Description"
- In Vacation Manager configuration panel scroll down to the section named Other and click Migrate (Migrate descriptions) button
- On the next screen you can choose if you want to overwrite data in description field if it is not empty
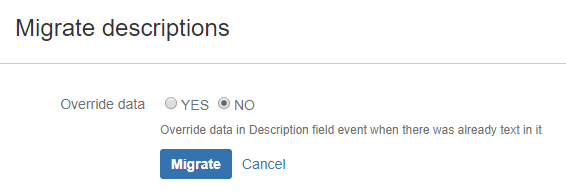
- Click Migrate to complete migration process
Note: Migration process will modify description fields only in issues in Vacation Manager project.
- In Vacation Manager configuration panel scroll down to the section named Other and click Migrate (Migrate descriptions) button
Add field "Description" to "VACMAN Field Configuration".
- Click Issues in JIRA administration section
- Go to Field configurations
- Find field configuration used by Vacation Manager (by default it is VACMAN Field Configuration) and Configure it
- Search for Description field and click on its Screens operation
- Check Create/Edit/View screens used by Vacation Manager (by default: VACMAN Screen Create, VACMAN Screen Edit, VACMAN Screen View)
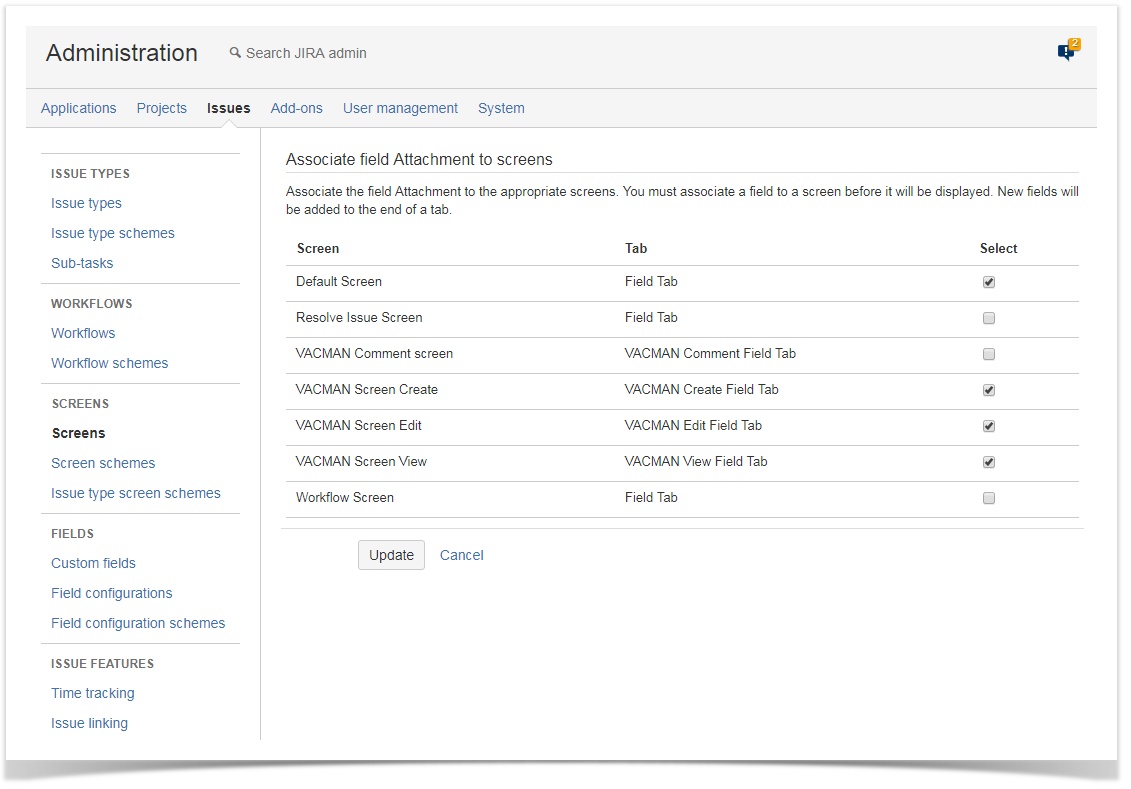
- Click Update to save changes
Add new custom field "Supervisor" of type "Team User Picker (Vacation Manager)" to "VACMAN Field Configuration".
- Click Issues in JIRA administration section
- Go to Custom fields
- Click Add Custom Field
- Select Advanced tab and choose Team User Picker (Vacation Manager)
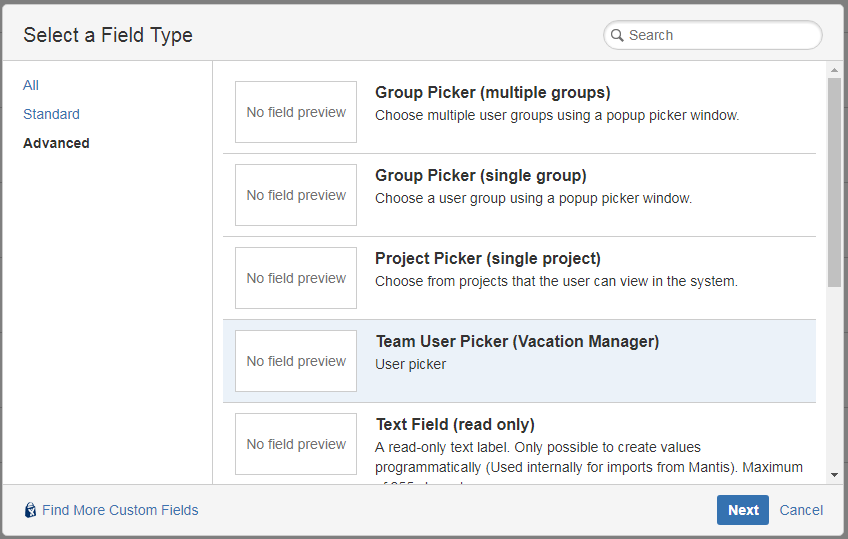
- Click Next, enter name Supervisor (you can add some description for a reference) and accept using Create button
- On next screen check Create/Edit/View screens used by Vacation Manager (by default: VACMAN Screen Create, VACMAN Screen Edit, VACMAN Screen View)
- Click Update to save changes
- Navigate back to Field Configurations, click Configure (for Vacation Manager project)
- Make supervisor field created in step "e" a required field
- Switch old supervisor field to optional (we will remove this field later)

Update configuration with created "Supervisor" field.
- In Vacation Manager configuration click Edit fields

- Select newly created Supervisor field (usually newly created Supervisor field has higher ID number)
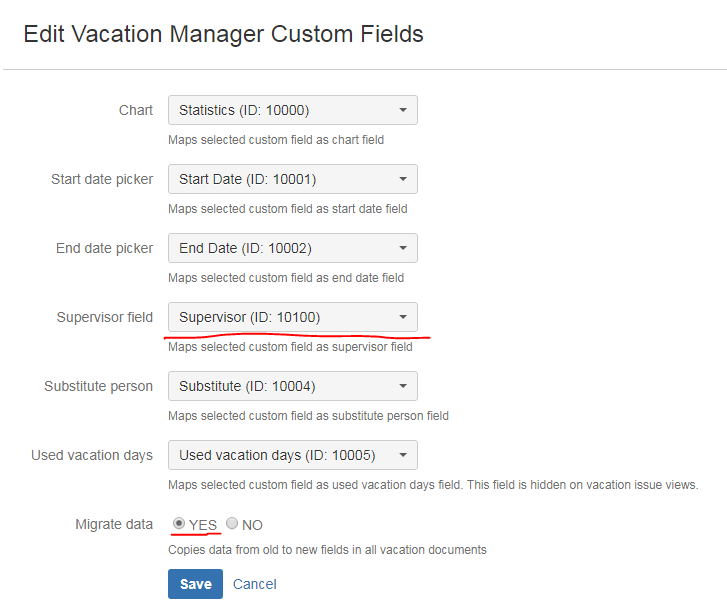
- Select YES in Migrate data option
- Click Save button to save configuration and move data in Vacation Documents from old to new Supervisor field
- In Vacation Manager configuration click Edit fields
Delete or Remove fields "Details" and "Supervisor".
After completing these steps, Vacation Manager for JIRA will be fully upgraded and ready to use with new features.
In case any questions or problems with the upgrade process you can contact with us via our Customer Portal.
Feel free to tell us what topic should be covered: vacationmanager@psc-software.atlassian.net