Jira hosting: Cloud, Data Center, Server
Jira hosting: Cloud, Data Center, Server
Triggers are one of the key features of The Scheduler. They determine the frequency of Scheduled Issue executions as well as the type and result of execution. Therefore you will find them in the app for each hosting version.
To read more, check the following sections:
Setting up trigger details
Trigger details can be set during Scheduled Issue creation on the third step of SI Wizard.
When you add a trigger to a Scheduled Issue, it is displayed in a triggers table. In that table, there are two options - to delete created triggers (2)(3) or preview upcoming executions (1)(4). It is possible to perform this action for a single trigger (1)(2) or a few/all of them by bulk action (3)(4).
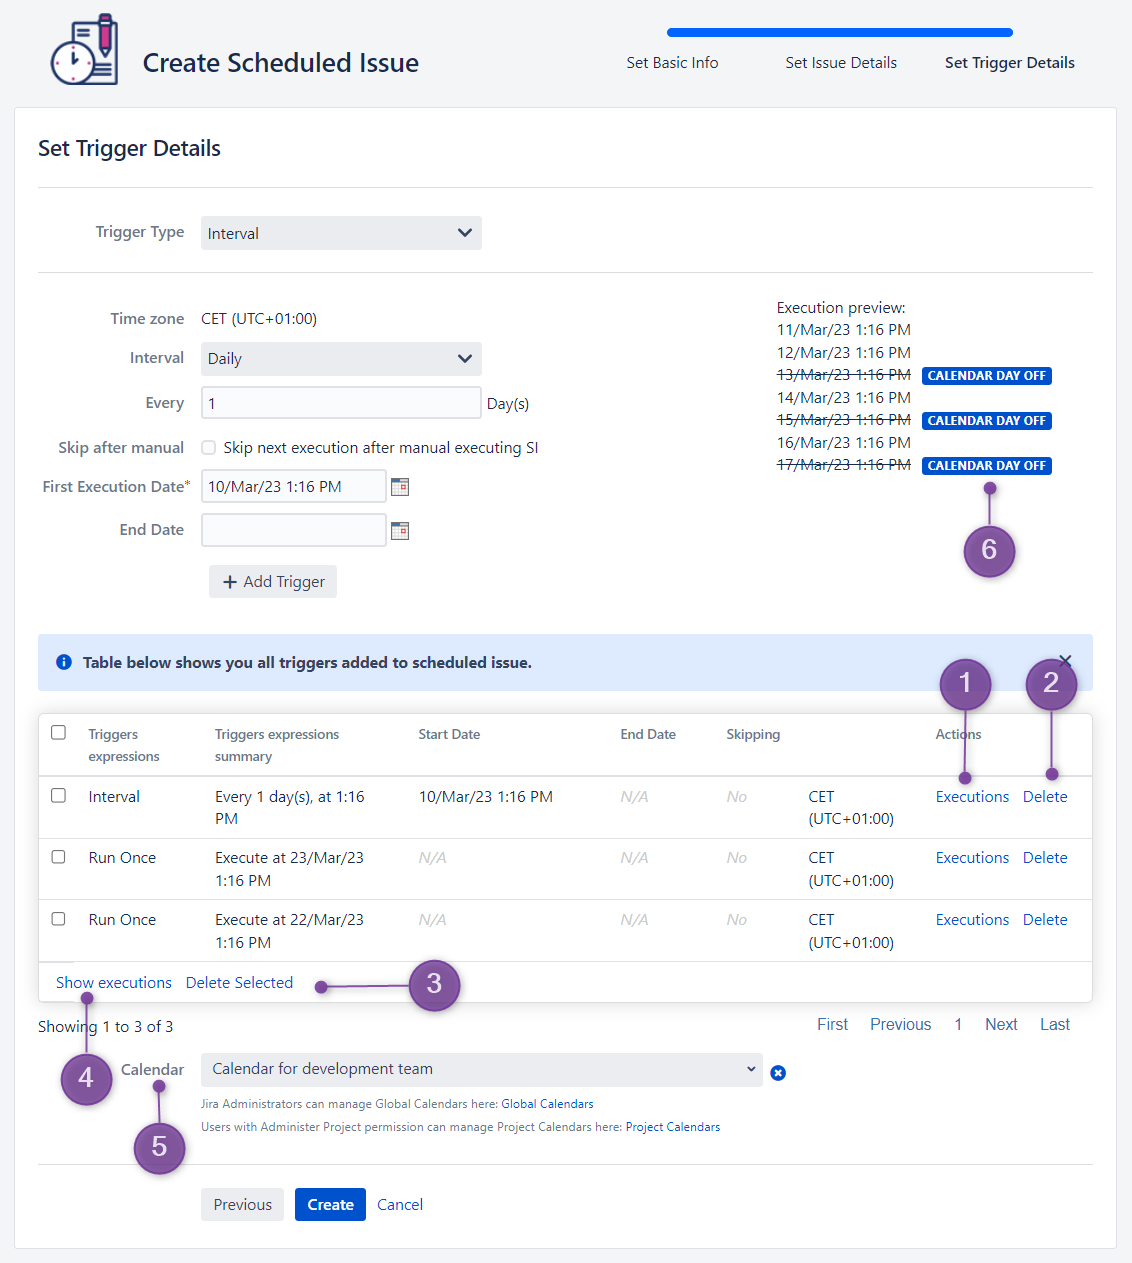
Executions preview is a convenient way to check if triggers match our expectations before SI is created. If something is wrong, you can easily remove incorrect triggers and add new ones.
It is also possible to add a calendar (5) according to which executions will take place. When a calendar event coincides with the execution date, it has the status “calendar day off” (6). On that date scheduled issue is skipped and not executed at all. It means that no issue will be created and the next fire time will be a subsequent execution from the list of upcoming executions.
Read more about calendars here: Calendars - Global and Project
For now, creating multiple triggers is available only in Server/ Data Center. |
Editing trigger settings
The Scheduler enables also editing triggers at any time. There are two ways to do so - by editing the whole SI or only triggers.
Here you can check how to edit the whole Scheduled Issue: Editing of the Scheduled Issue
Editing triggers is a more convenient way If you don’t need to modify basic info or issue details of SI.
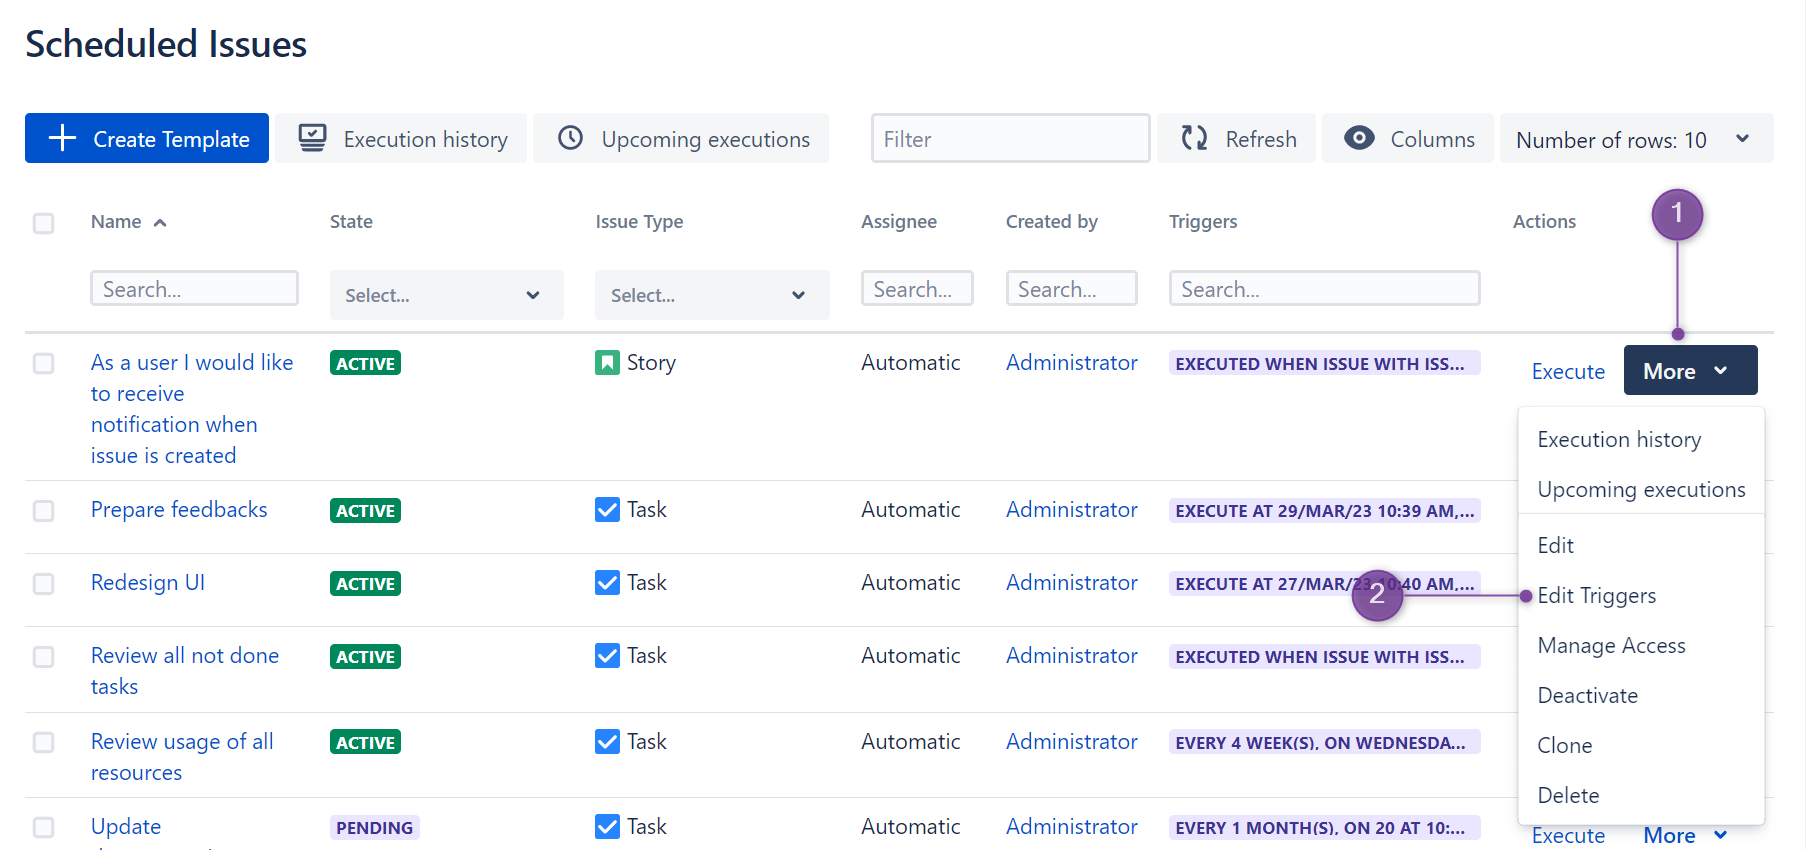
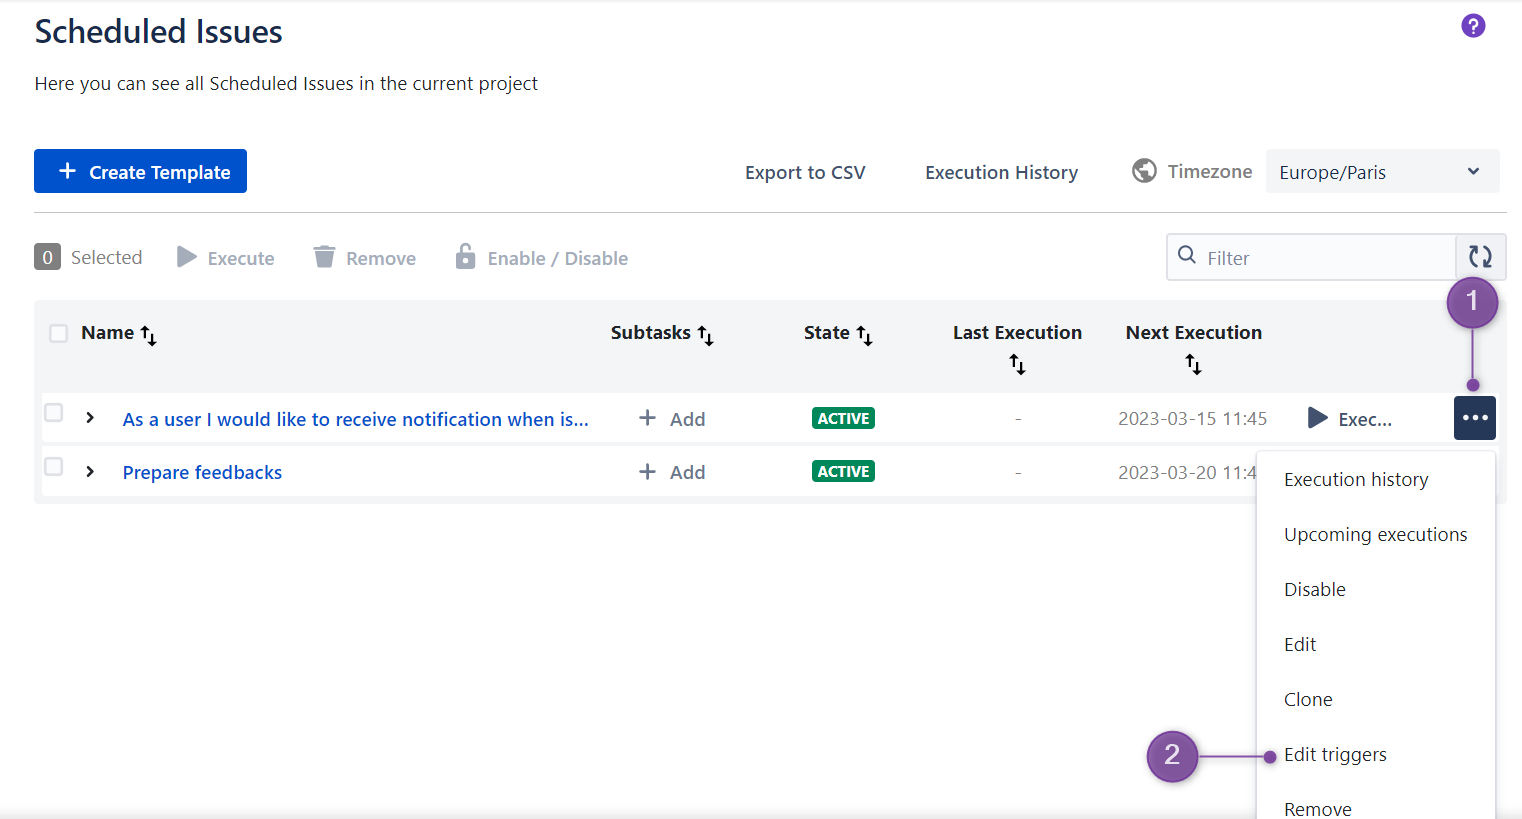
To make changes in your triggers, open a drop-down list with more actions (1) next to a Scheduled Issue that you want to modify. Click Edit triggers (2) and then you should be able to make modifications in a displayed modal. You can read more here: Edit triggers
Trigger types
Cron Expression
This type of trigger gives you a great opportunity to adjust the frequency of executions to your needs. It is available both in The Scheduler for Data Center as well as Cloud.
Check examples of advanced cron expressions: Advanced Cron Expression Examples
To add a cron trigger to your Scheduled Issue you need to select “Cron Expression” (“Cron” in Cloud) trigger type (1), and schedule it (2) with a dedicated time interval (3). Optionally there is also a start date (4) and end date (5) that will set a time frame for a sequence of executions.
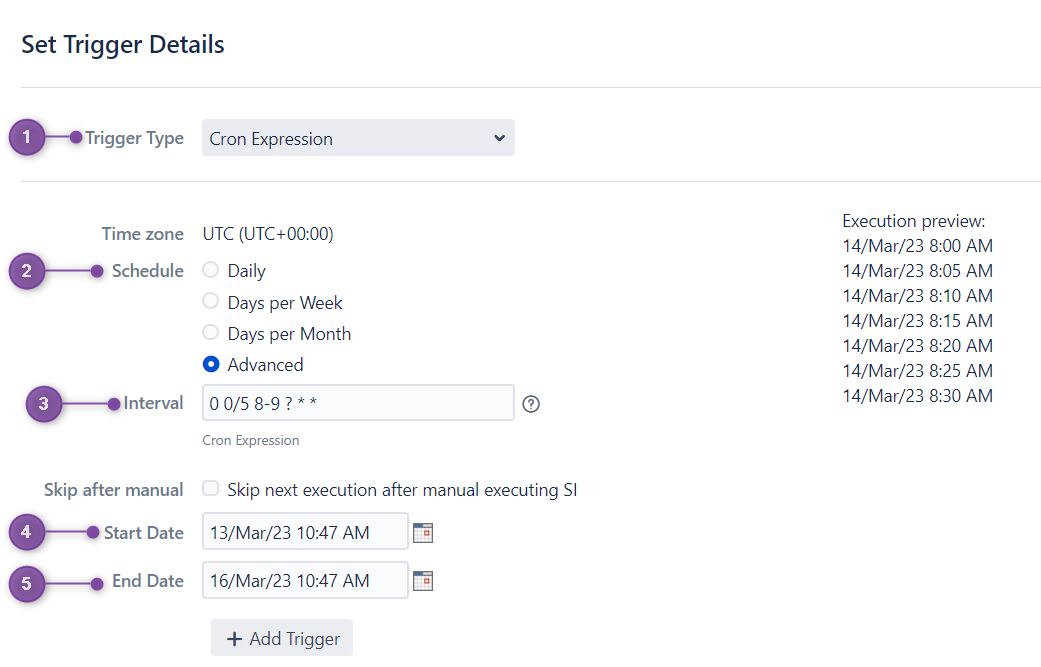
In Cloud we do not support triggers with executions more frequently than every hour. In Data Center, you can set executions as often as you want, even every 1 minute. |
Interval
Interval trigger type (1) is a trigger type that determines the repeated occurrence of executions in a strictly defined time interval. User can choose whether the interval will be measured in days, weeks, months, or years (2) and how many days/week/months/years have to pass between each execution (3).
To set this trigger you need to provide the first execution date (4) which is a time for the automatic creation of an issue. Optionally you can also set the end date for executions. By default In Data Center, this field is empty and in Cloud a “Never” option is selected. In both cases, it means that there is no final execution date and issues will be created as long as an app is active.
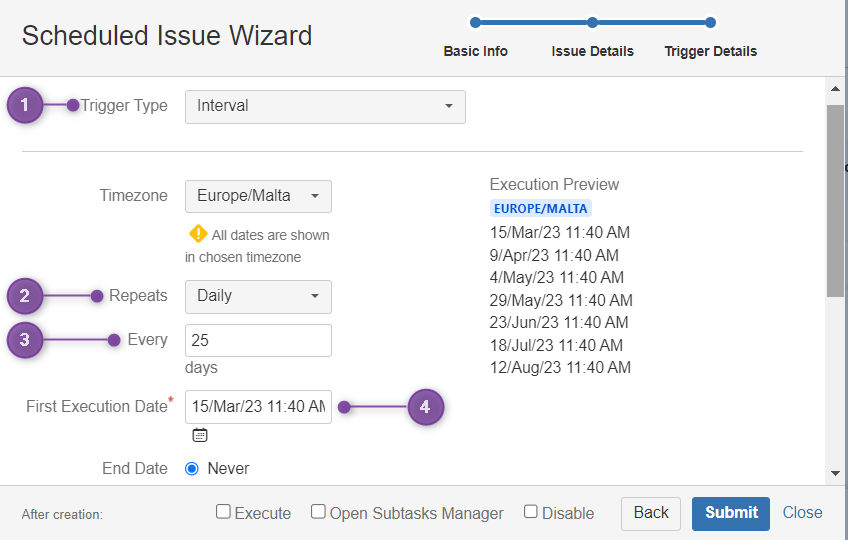
Interval trigger is a good choice for tasks that have to be created in a regular time span and less frequently than daily.
Remember that daily interval counts calendar days, not business days. |
Run Once
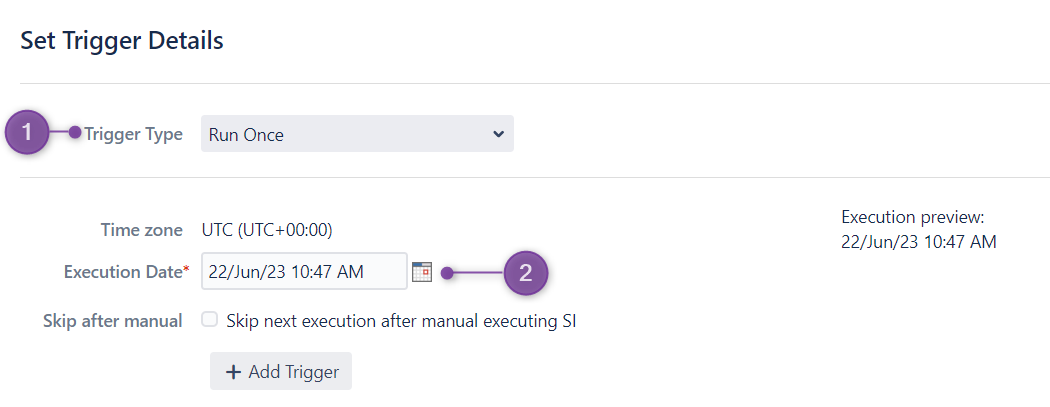
Run Once is a one-time trigger type (1), causing only one execution in a strictly defined time (2). In Cloud you can create only one trigger but in DC you have the option to add more run-once triggers which seems to be a perfect solution for tasks that has to be created irregularly, severally.
Workflow
Workflow trigger type (1) is available only in Data Center version of The Scheduler. While most triggers are time-dependent, this trigger is dependent on the status of tasks.
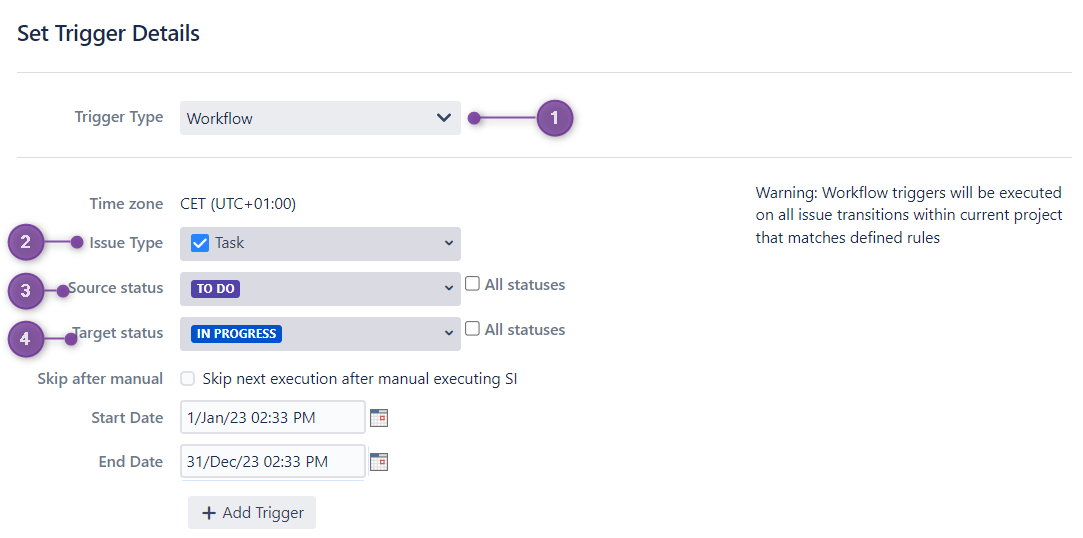
Not every transition will initiate the executions. You can select one issue type during SI creation (2). Transitions of the selected issue type will cause an execution.
The Scheduler also requires setting a source status (3) and a target status (4). Transition between them will trigger new execution. You have four options to set a transition:
From one defined status to another one strictly defined (eg. From “To do” to “In progress”)
From all statuses to one, defined status (eg. from all statuses to “Done”)
From all statuses to all statuses (any transition within specified issue type will cause a trigger)
From a one defined status to all statuses (eg. from “To do” to all statuses)
Manual
Manual trigger is available only in The Scheduler for Jira Cloud. To set this trigger you need to select Manual trigger type (1) from a drop-down list. Below you should see information (2) that job will not be scheduled but can be executed at any time using the “Execute” button.
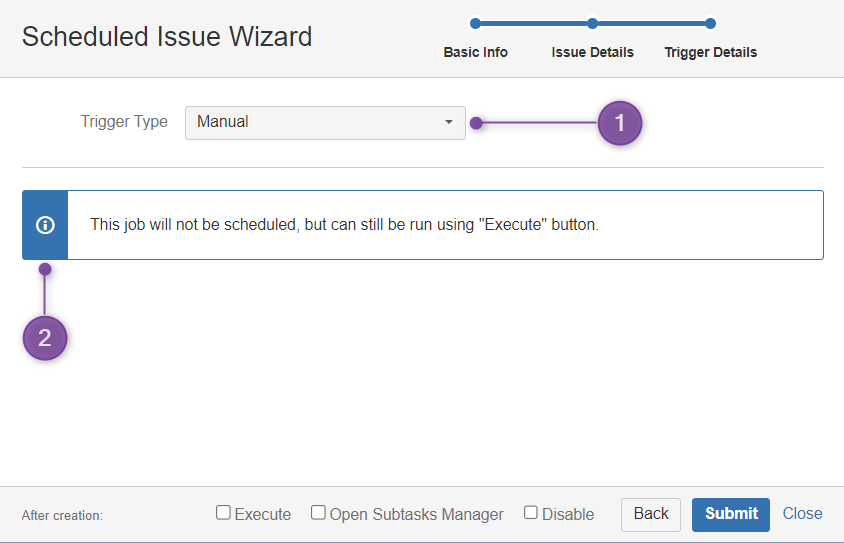
If you want to set manual trigger in a The Scheduler for Jira Data Center you can just leave the Scheduled Issue without any triggers. As in Cloud, you will be able to run this Scheduled Issue any time.