...
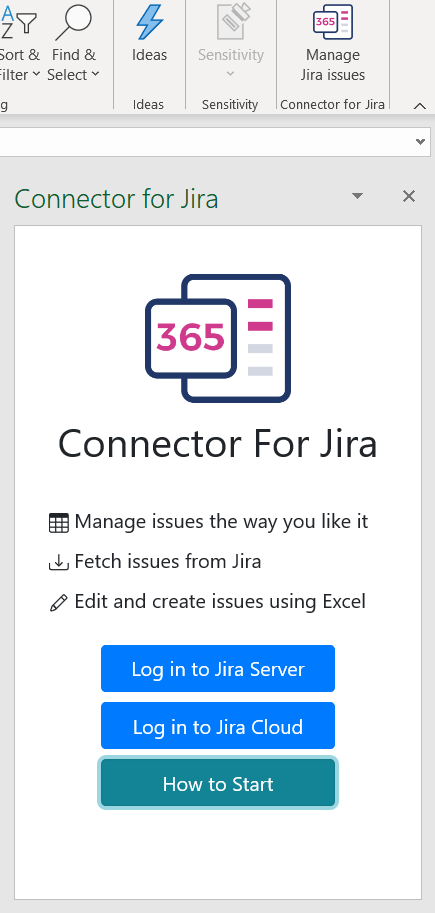
In Excel, in the Home panel find “Connector for Jira”, you will seen an icon with the app logo:

In case if you have installed the app, but cannot find it in ribbon, please check ribbon customization options, to make sure app is added and selected in any of visible Excel tabs:
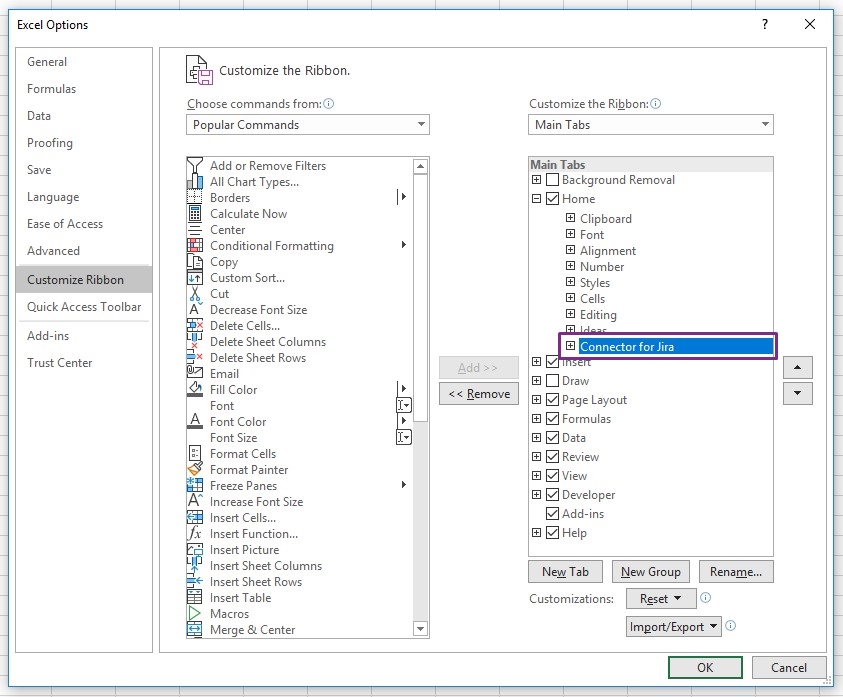
Note: you can easily change its position to fit your need.
Click on the Icon, it will open a panel with app logo, usage examples and action buttons (this page is linked under ‘How to start button’
 ):
):
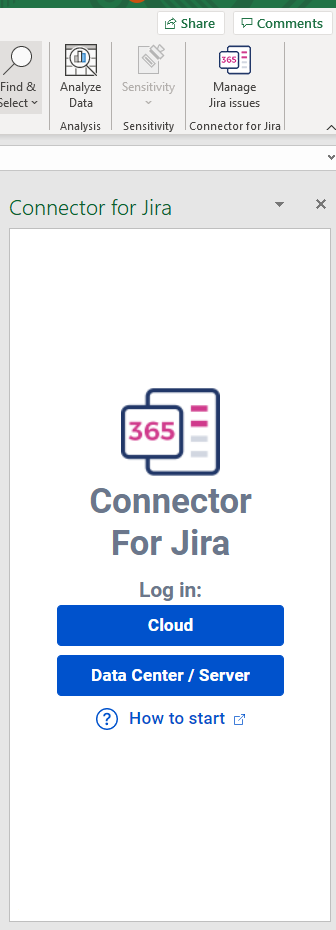
Depend on with which version of Jira do you want connect, click on “Log in to Jira Server” or “Log in to Jira Cloud” button.
After click “Log in to Jira Server” you will see a login form, where you need to specify your login details:
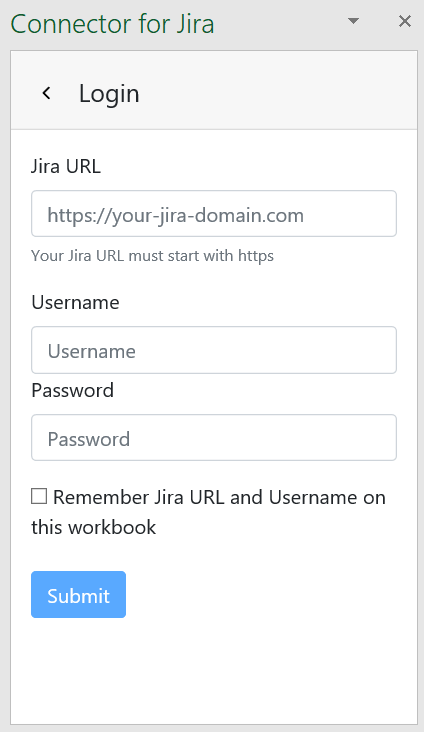
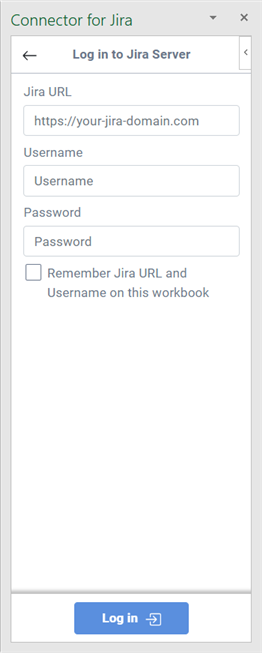
Jira URL - your Jira base URL, it must be your instance URL.
Your Jira must be running on https, your URL must not include any trailing signs. Eg. correctly looking link https://your-jira.your-domain.comUsername
Username, which you use to login to Jira.Password
Password, which you use to login to Jira.
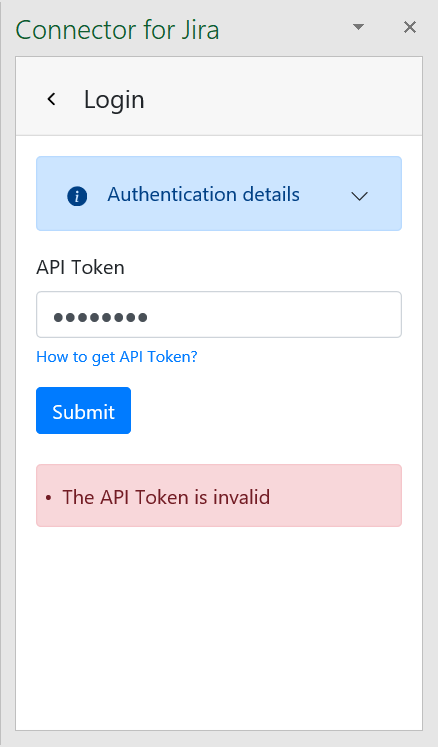
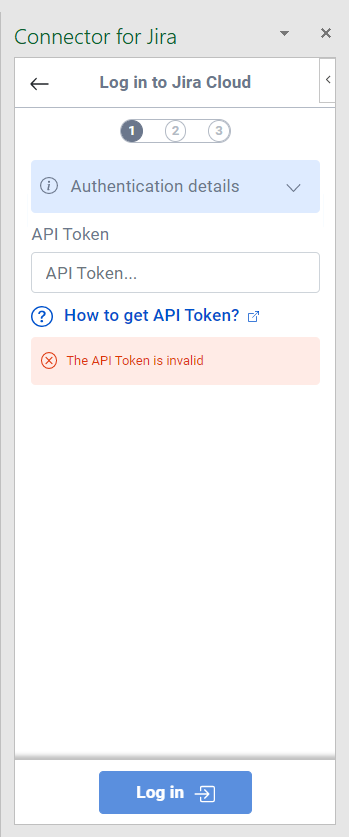
After click “Log in to Jira Cloud” you will see a login form, where you need to place API Token
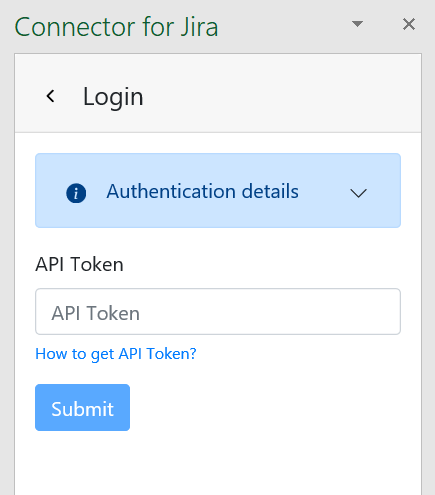
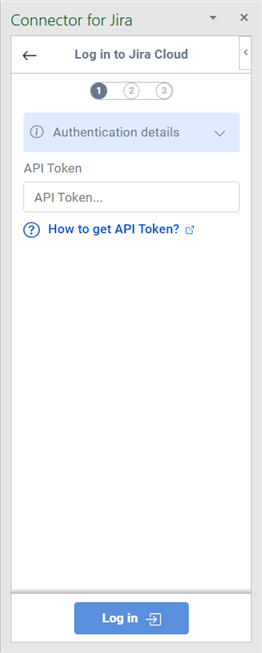
Note: All information from this point you can find in excel after expand “Authentication details” label.If you don’t have, create API token. Information how to create API Token, you can find there: How to generate API token
In field 'API Token' put you generated API token.
When you use 'Submit' button 2 things will happen:
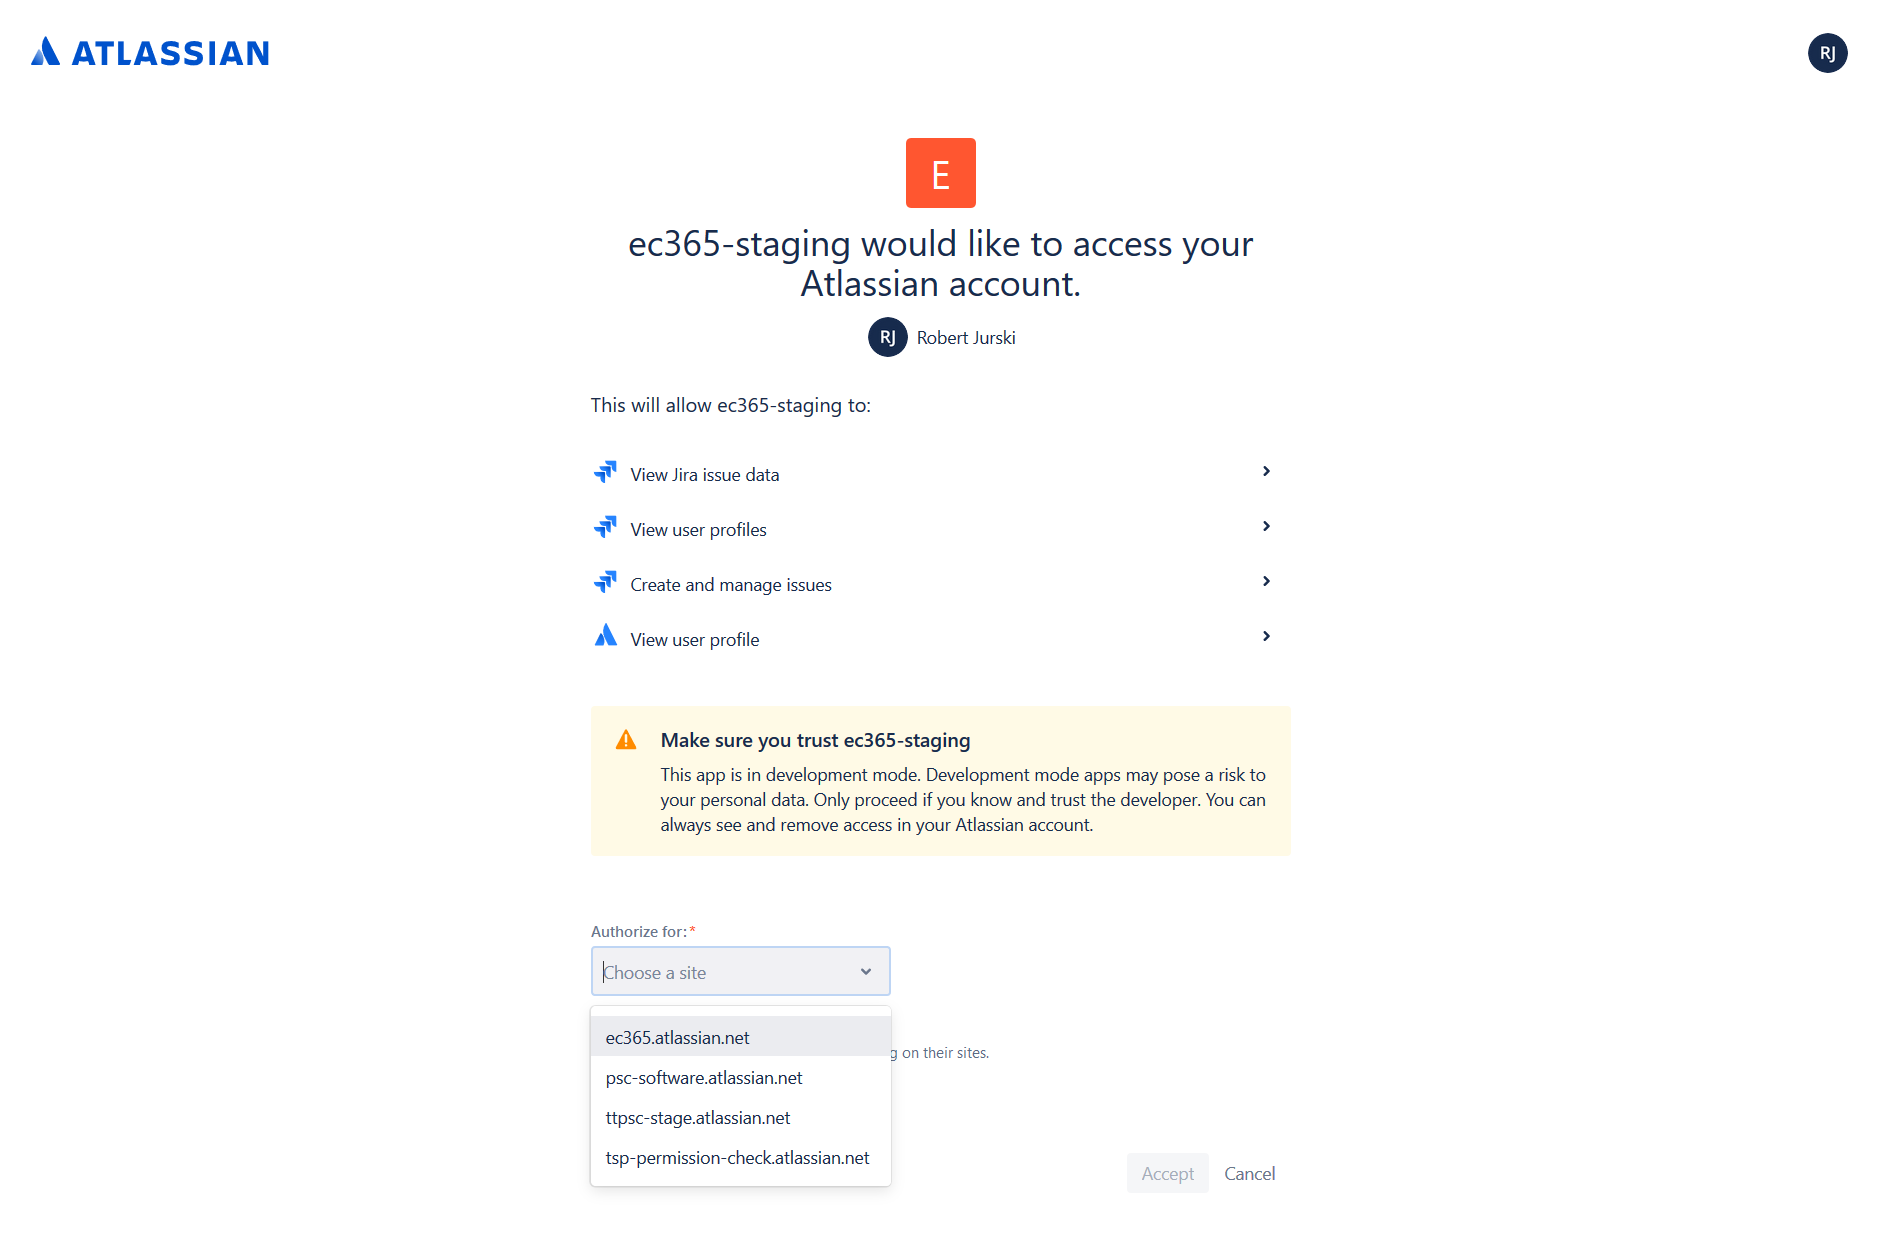
New page will open up in your browser - on that page, choose Jira Cloud which you want to access and use 'Accept'. New page with “Login successful” inscription is displayed in the browser.
In Excel you will see Authorization view, after you are done with step below - use the 'Verify authorization' button. You need to click that before countdown time is up (120 seconds). If time is up, you need start your verification from the beginning. This is used for security reasons.

If successful, you will see general page.
If you enter wrong API token, there will be displayed information “The API Token is invalid”.
*If you grant access to more than 1 Jira, you will have to choose which one you are going to use in current session.
Note: Due to security reasons, you will have to use token each time you login through app.
When you successfully login, you will unlock app features and see new screen:

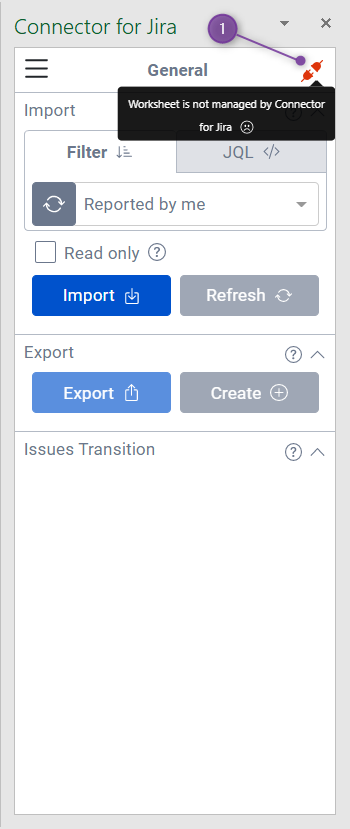
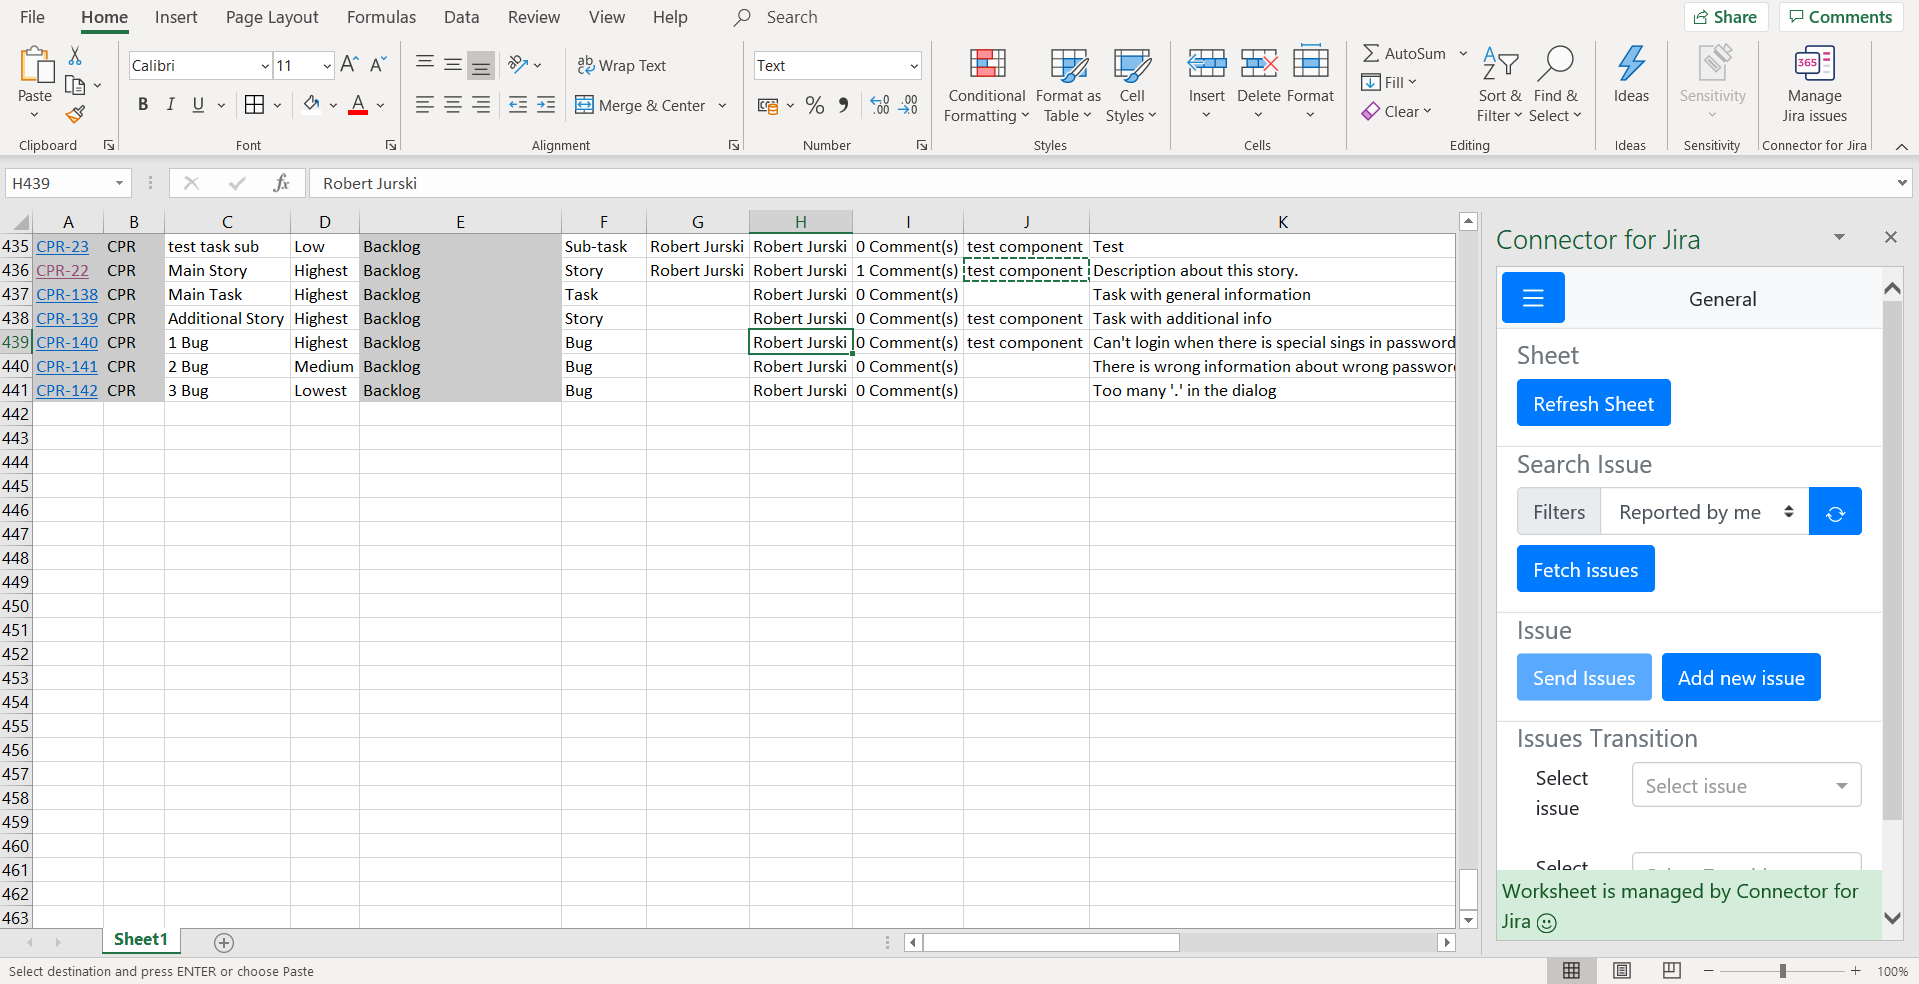
Notice: there is red plug icon(1) and warning about worksheet not being managed by Connector for Jira - it means there is no metadata linked with this worksheet, in other words no issues were fetched or created from this sheet. We will get into this later on.
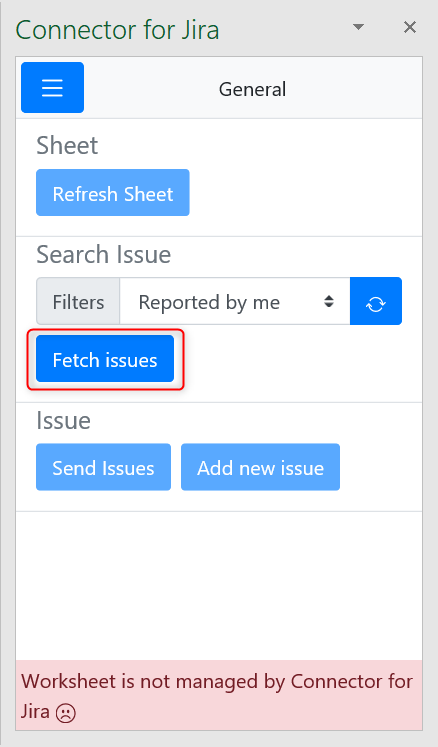
Getting data from Jira issues: to start working with the app and tasks you need to get some data. you can start by selecting filter e.g. “Reported by me” then use the “Fetch issues” button. When you do that, Connector for Jira will download all issues from that filter to your workbook. You can learn more about getting Jira issues into Excel in this section: Fetching issues
Now you can start working with data.
Edit existing issues.
Create new issues: Create new issue
When you make changes Excel will color some of the cells, more about colors: Color legend [old]
When you create/edit issues remember to use “Send issues” button - it will send updates to Jira (it’s like a save button, sending changes to Jira), it will send all changes made in the sheet, with confirmation prompt.
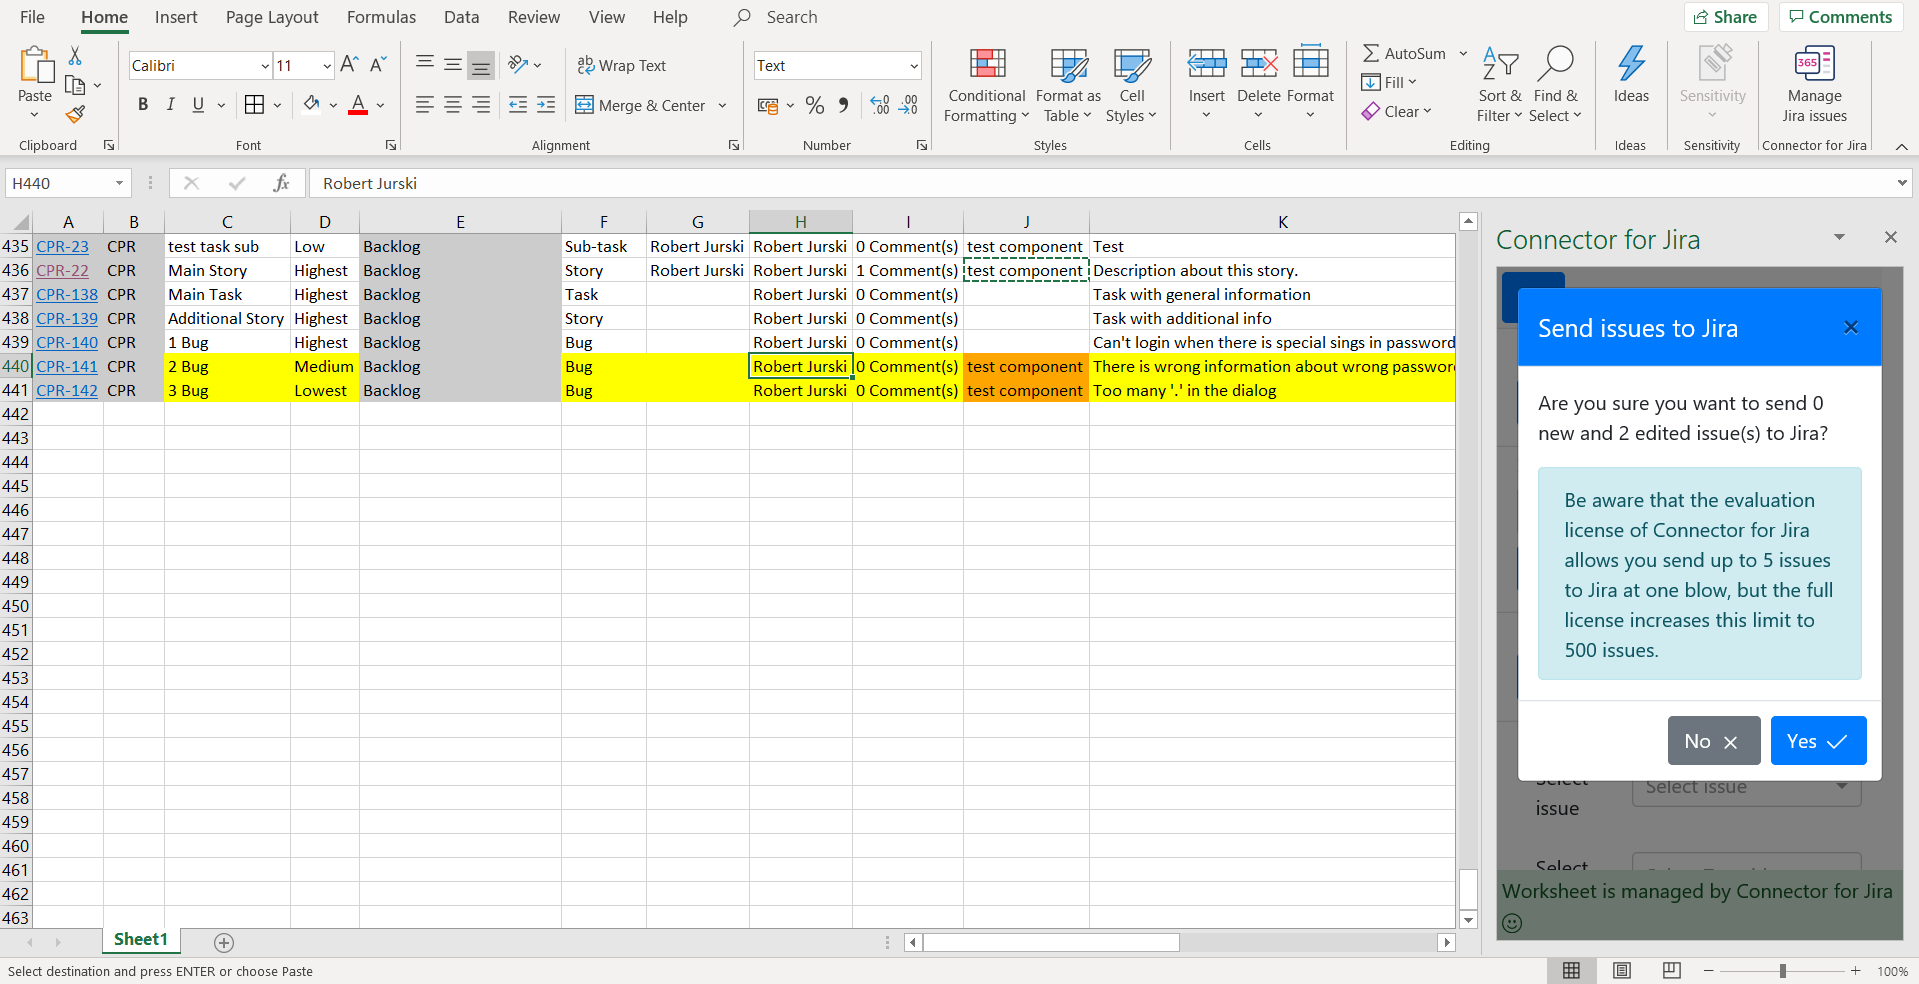
When you confirm changes and sending all issue changes end with success, coloring will disappear.If you are creating reports / doing calculation based on available fields: you can use “Refresh Sheet” to check, if any data from displayed issues was updated in Jira in the meantime.
When you are done or need to take break, you can save file and get back to it later. Just remember, when you want send your changes to Jira you need to be logged in again.

...